前言 这是这个系列的第三篇了,这一篇会介绍一下React中的小技巧
为属性设置默认值 通过一个静态属性defaultProps声明属性默认值
当然你也可以在构造函数里通过mixin来手动给一个默认值
使用下面的示例
1
2
3
4
5
6
7
8
9
10
11
12
13
14
15
16
17
18
19
20
21
22
23
24
25
26
27
28
29
30
31
32
33
34
class Comp extends React .Component <any , any > state = { num : this .props.num } handleClick = () => { this .setState({ num : this .state.num + 1 }) } static defaultProps = { a : 1 , b : 2 , c : 3 , num : 0 } constructor (props : any ) super (props); console .log(props) } render ( console .log("render" ) return ( <> <p>{this .state.num}</p> <button onClick={this .handleClick}>点我</button> </> ) } }
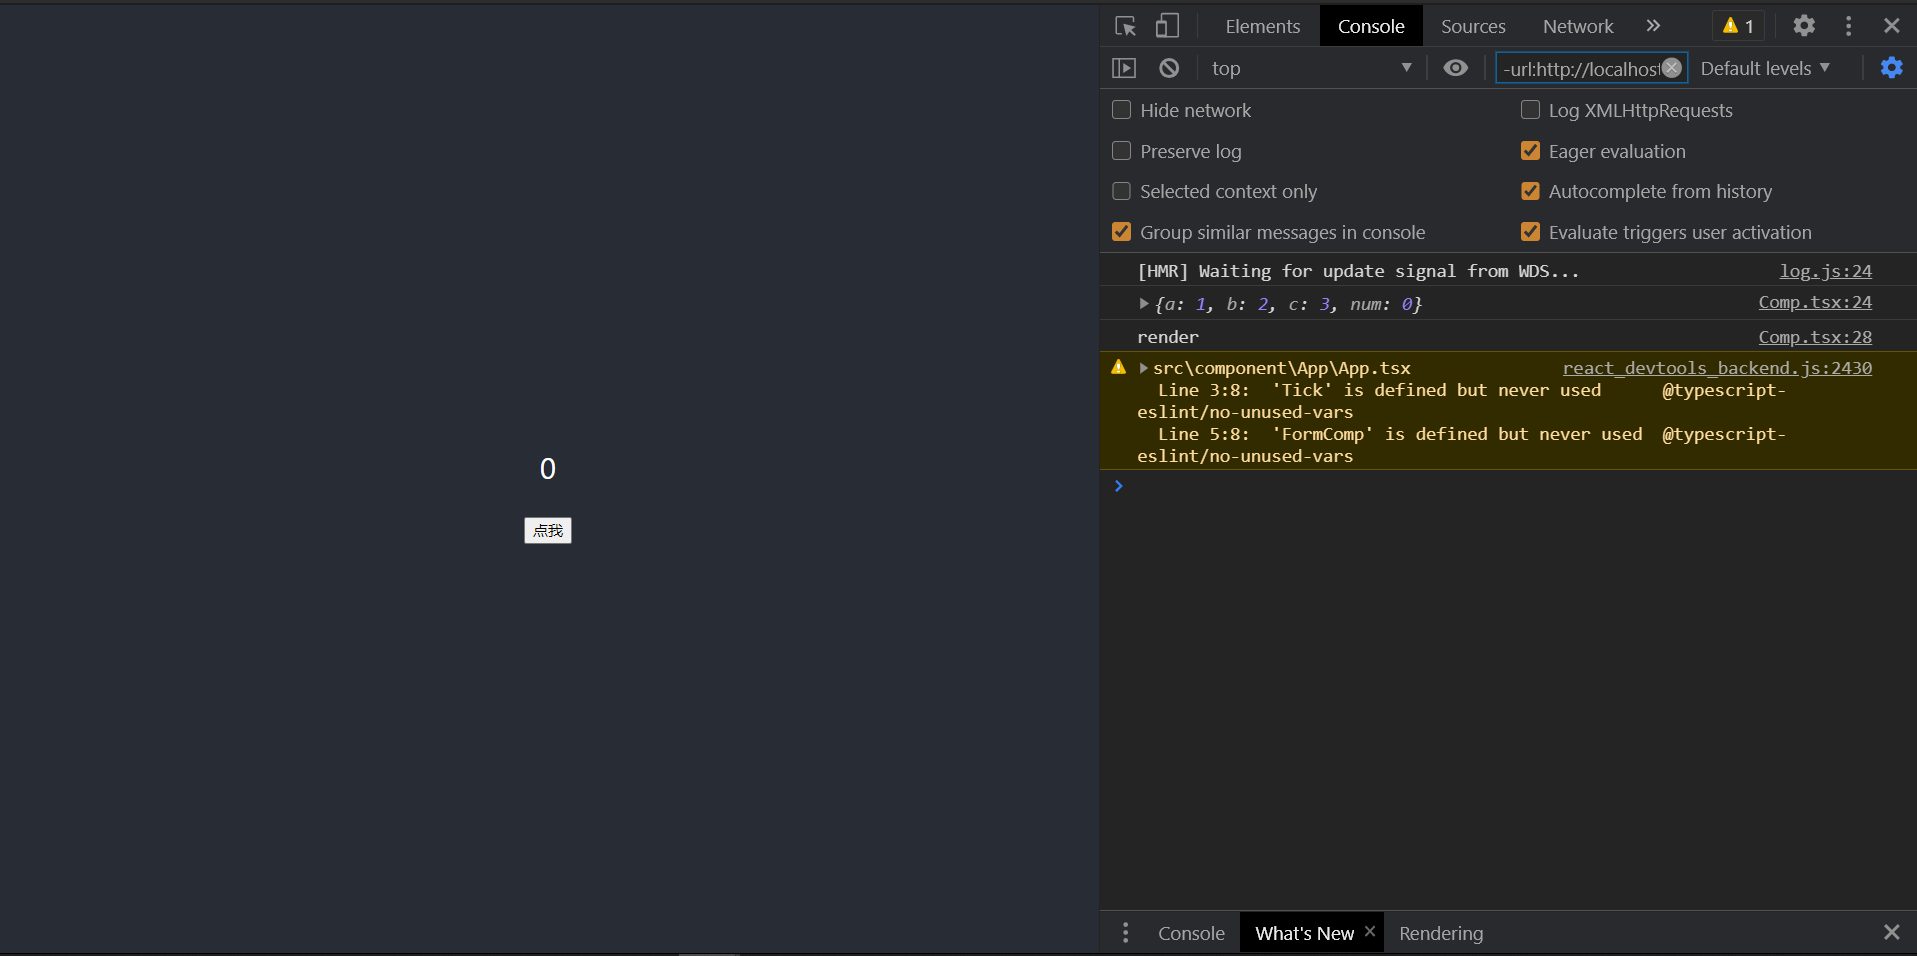
在不给组件传递任何props的时候
控制台输出如下
属性类型验证 如果你使用的Typescript,直接使用Typescript进行类型验证就可以了
1
2
3
4
5
6
7
8
9
10
11
12
13
14
15
16
17
18
19
20
21
22
23
24
25
26
27
28
29
30
31
32
33
34
35
36
37
38
39
40
41
42
43
44
45
46
47
48
49
50
51
52
import React from "react" ;interface IProps { a : number , b : number , c : number , num : number , onClick : Function } interface IState { num : number } class Comp extends React .Component <IProps , IState > state = { num : this .props.num } handleClick = () => { this .setState({ num : this .state.num + 1 }, () => { this .props.onClick(this .state.num) }); } static defaultProps = { a : 1 , b : 2 , c : 3 , num : 0 , onClick ( } constructor (props : any ) super (props); console .log(props) } render ( console .log("render" ) return ( <> <p>{this .state.num}</p> <button onClick={this .handleClick}>点我</button> </> ) } } export default Comp;
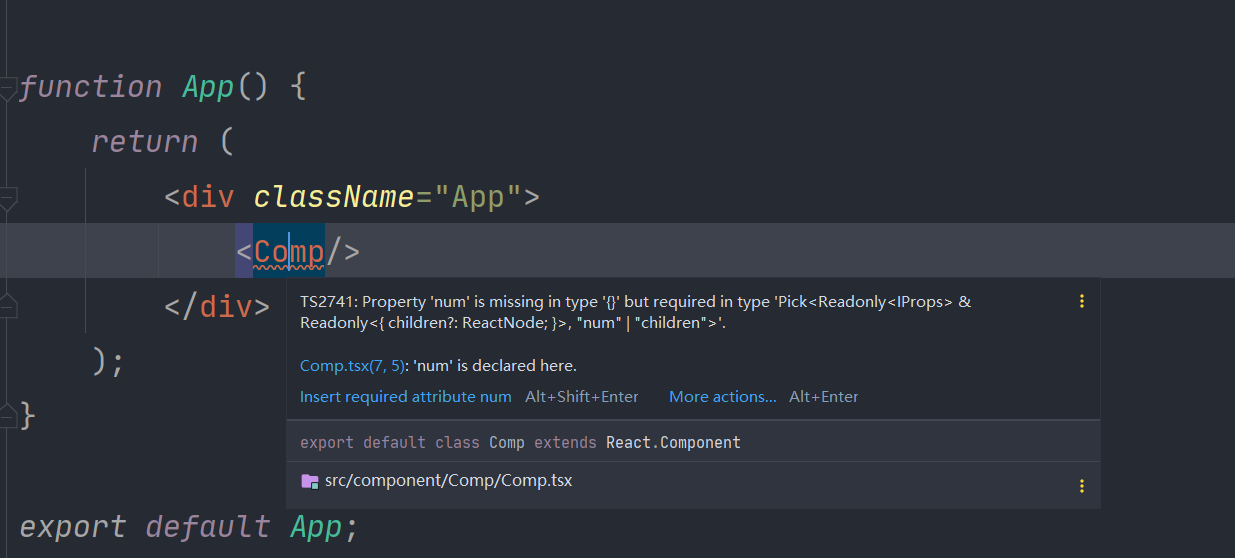
检查到错误就会报错
如果使用的是JavaScript,可以使用库prop-types来进行类型验证
https://www.npmjs.com/package/prop-types
先来看看一些基本规则
1
2
3
4
5
6
7
8
9
10
11
12
13
14
15
16
17
18
19
20
21
22
23
24
PropTypes.any: PropTypes.array: PropTypes.bool: PropTypes.func: PropTypes.number: PropTypes.object: PropTypes.string: PropTypes.symbol: PropTypes.node: PropTypes.element: PropTypes.elementType: PropTypes.instanceOf(构造函数): PropTypes.oneOf([xxx, xxx]): PropTypes.oneOfType([xxx, xxx]); PropTypes.arrayOf(PropTypes.XXX): PropTypes.objectOf(PropTypes.XXX): PropTypes.shape(对象): PropTypes.exact({...}): 属性: function (props, propName, componentName ) }
用法如下,声明propTypes属性一下即可
1
2
3
4
5
6
7
8
9
10
11
12
13
14
15
16
17
import React from "react" ;import PropTypes from "prop-types" ;class Comp extends React .Component <IProps , IState > static propTypes = { a : PropTypes.number.isRequired, b : PropTypes.number.isRequired, c : PropTypes.number.isRequired, num : PropTypes.number.isRequired, onClick : PropTypes.func.isRequired } } export default Comp;
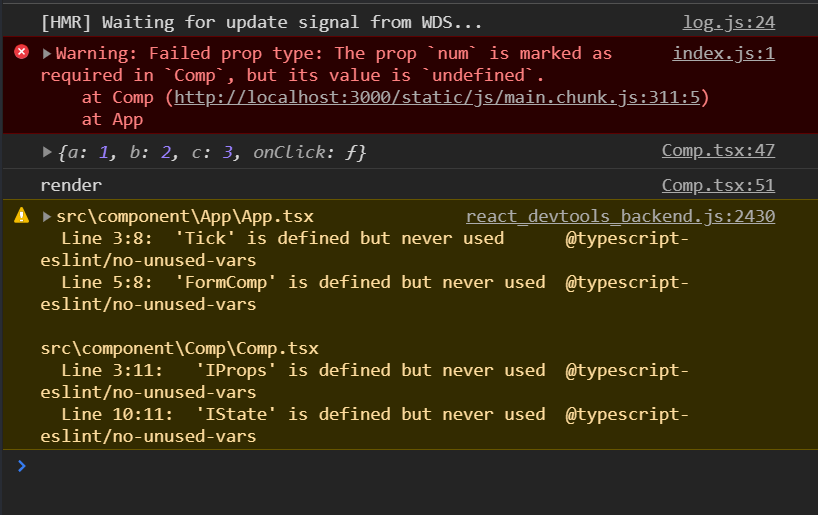
如果检查到了错误,就会在控制台报错
HOC HOC翻译过来高阶组件,它的概念和高阶函数非常相似
HOF:Higher-Order Function, 高阶函数,以函数作为参数,并返回一个函数
HOC: Higher-Order Component, 高阶组件,以组件作为参数,并返回一个组件
HOC一般用来实现横切关注点,或者说实现面向切面编程
https://www.zhihu.com/question/24863332
举个非常通俗易懂的例子,比如在登录后,我们希望每个请求头中都带上服务器返回给我们的token,然后在数据返回给我们的时候进行一些检查,把真实的数据提取出来,在axios就可以这么写
1
2
3
4
5
6
7
8
9
10
11
12
13
14
15
16
17
18
19
20
21
22
23
24
25
26
27
28
29
30
31
32
33
34
35
36
37
import axios from "axios" ;import Vue from "vue" ;axios.defaults.withCredentials = true ; const instance = axios.create({ baseURL : "..." , timeout : 3000 }); instance.interceptors.response.use((response ) => { const data = response.data; const code = data.code; const realData = data.data; if (code == 0 ){ return realData; } if (code == 406 ) { Vue.prototype.$router.push({name : "login" }); } Vue.prototype.$message.warning(data.msg); return Promise .reject(data); }, (err ) => { Vue.prototype.$message.error(err.toString()); return Promise .reject(err) }); instance.interceptors.request.use((config ) => { config.headers.token = localStorage .token; config.headers['Cache-Control' ] = 'no-cache' ; return config; }, function (error ) return Promise .reject(error); }); export default instance;
另外,我们如果要使用CORS,在express中就可以使用一个CORS中间件,而不是每个请求里都加一遍
下面康康怎么用HOC吧,假如某些组件是登录才可见的,我们可以这样写
1 2 3 4 5 6 7 8 9 10 11 12 13 import React from 'react' export default function withLogin (Comp ) return function LoginWrapper (props ) let {isLogin, ...p} = props; if (isLogin) { return <Comp {...p } /> } return null ; } }
1 2 3 4 5 6 7 8 9 const CompWithLogin = withLogin(Comp);function App ( return ( <div className="App" > <CompWithLogin isLogin={false } a={1 }/> </div> ); }
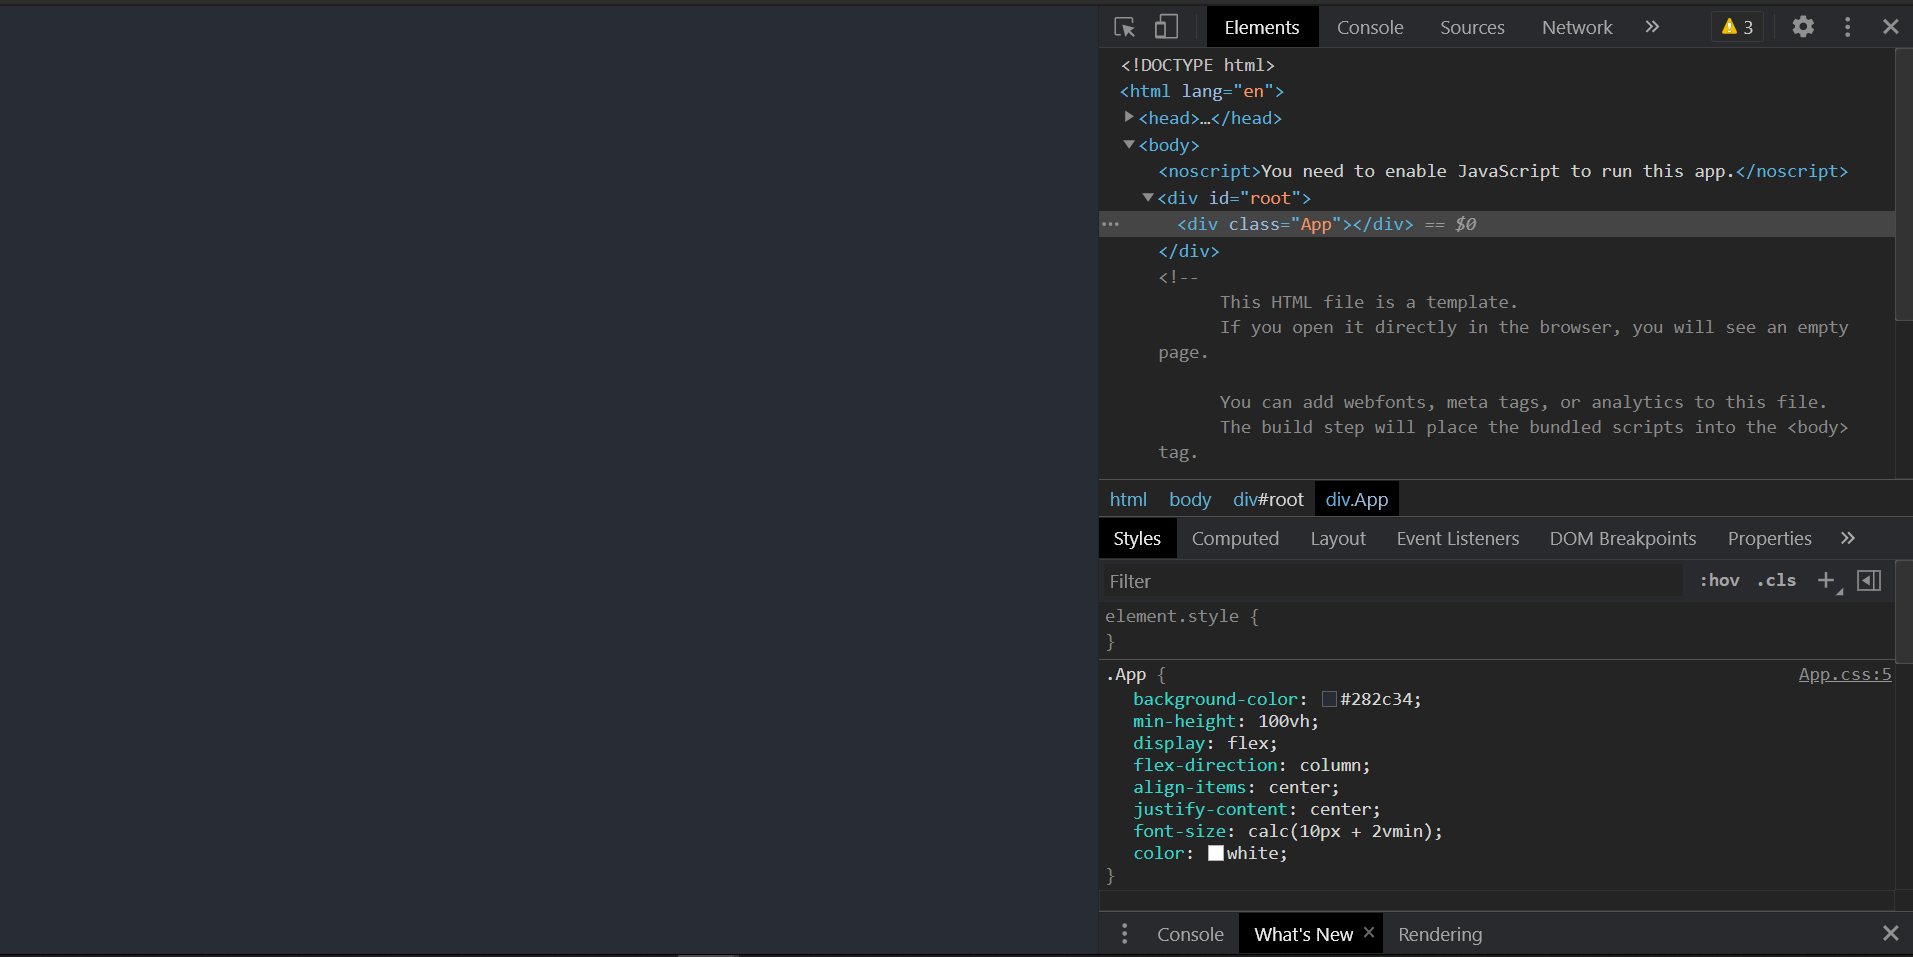
这时候页面就什么都不会渲染了
如果你要使用TS,事情就会变得麻烦一点,有时甚至非常蛋疼
1
2
3
4
5
6
7
8
9
10
11
12
13
14
15
16
17
18
19
20
21
22
23
24
25
26
27
import React from "react" ;export default function withLog <P >(Comp : React.ComponentType<P>, compName : string = "" ) : React .ComponentType <P > class LogWrapper extends React .Component <P > constructor (props : P ) super (props); } componentDidMount ( console .log(`日志:组件${compName} 被创建了!${Date .now()} ` ); } componentWillUnmount ( console .log(`日志:组件${compName} 被销毁了!${Date .now()} ` ); } render ( return ( <> <Comp {...this.props} /> </> ) } } return LogWrapper; }
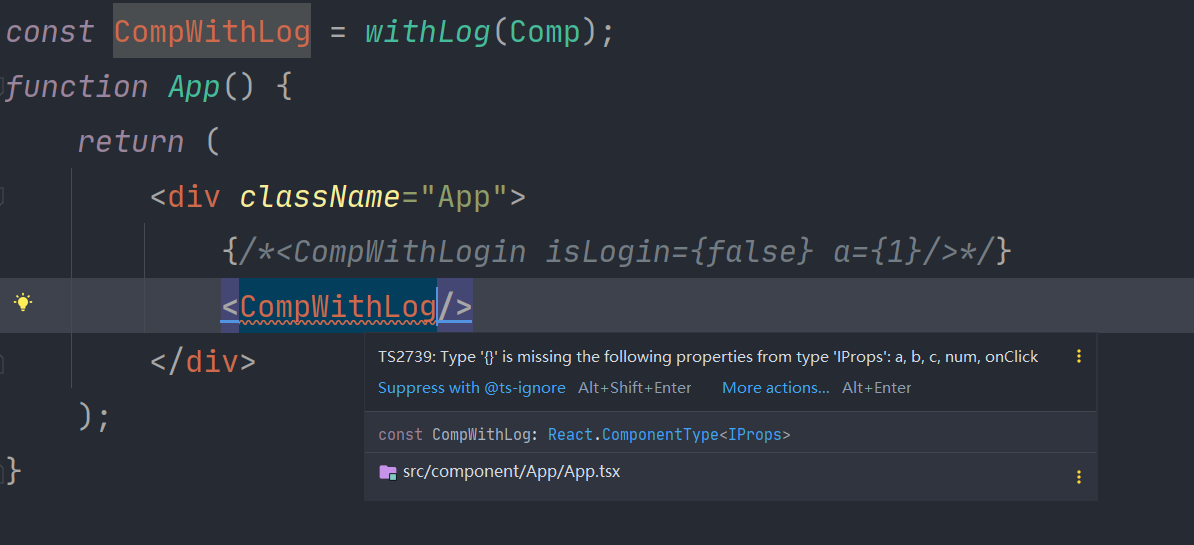
看起来没啥问题,但是你用起来发现事情不大对劲
看起来是默认props的信息丢失了,毕竟这玩意没有那么智能
那可以改一改(然后我写了半小时)
1
2
3
4
5
6
7
8
9
10
11
12
13
14
15
16
17
18
19
20
21
22
23
24
25
26
27
28
29
30
31
import React from "react" ;type RemoveDFP<P, D> = Pick<P, Exclude<keyof P,keyof D>> & Partial<P>export default function withLog <P , T >(Comp : React.ComponentType<P> | any , compName : string = "" ) : React .ComponentType <RemoveDFP <P , T >> { class LogWrapper extends React .Component <RemoveDFP <P , T >> constructor (props : P ) super (props); } componentDidMount ( console .log(`日志:组件${compName} 被创建了!${Date .now()} ` ); } componentWillUnmount ( console .log(`日志:组件${compName} 被销毁了!${Date .now()} ` ); } render ( return ( <> <Comp {...this.props}/> </> ) } } return LogWrapper as React.ComponentType<RemoveDFP<P, T>>; }
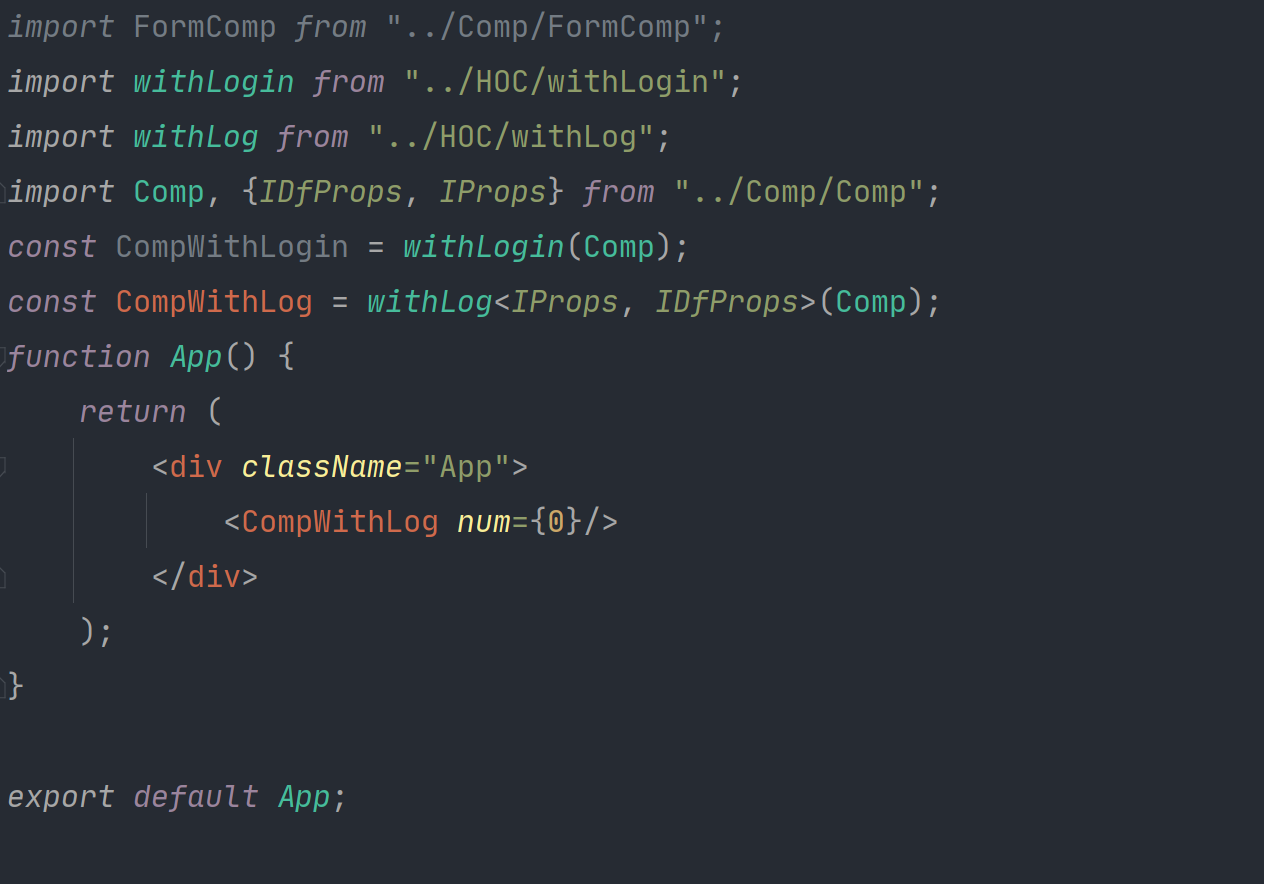
1
2
3
4
5
6
7
8
9
10
11
import withLog from "../HOC/withLog" ;const CompWithLogin = withLogin(Comp);import Comp, {IDfProps, IProps} from "../Comp/Comp" ;const CompWithLog = withLog<IProps, IDfProps>(Comp);function App ( return ( <div className="App" > <CompWithLog num={0 }/> </div> ); }
1
2
3
4
5
6
7
8
9
10
11
12
13
14
15
16
17
18
19
20
21
22
23
24
25
26
27
28
29
30
31
32
33
34
35
36
37
38
39
40
41
42
43
44
45
46
47
48
49
50
51
52
53
54
55
56
57
58
59
60
import React from "react" ;import PropTypes from "prop-types" ;interface IProps { a : number , b : number , c : number , num : number , onClick : Function } interface IState { num : number } interface IDfProps { a : number , b : number , c : number , onClick : Function } class Comp extends React .Component <IProps , IState > state = { num : this .props.num } handleClick = () => { this .setState({ num : this .state.num + 1 }, () => { this .props.onClick(this .state.num) }); } static defaultProps : IDfProps = { a : 1 , b : 2 , c : 3 , onClick ( } constructor (props : any ) super (props); console .log(props); console .log(this ); } render ( console .log("render" ) return ( <> <p>{this .state.num}</p> <button onClick={this .handleClick}>点我</button> </> ) } } export default Comp;export type {IDfProps, IProps, IState};
传了num时
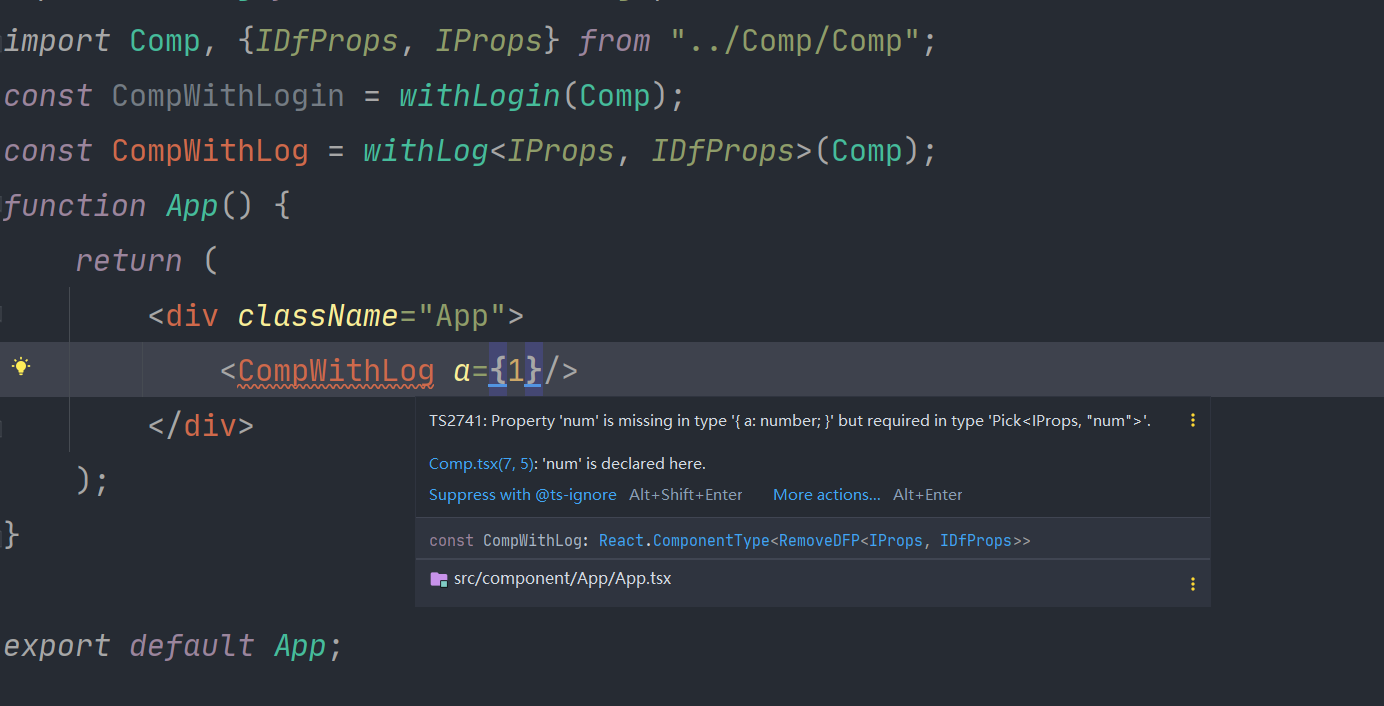
没传时
orz,另外,如果有些参数是HOC本身要用的,可以这样写(这里没有处理props默认值)
1
2
3
4
5
6
7
8
9
10
11
12
13
import React from 'react' interface IProps { isLogin ?: boolean } export default function withLogin <T >(Comp : React.ComponentType<T> ) : React .ComponentType <Partial <T > & IProps > return function LoginWrapper (props : IProps & Partial<T> ) let {isLogin, ...p} = props; if (isLogin) { return <Comp {...p as T } /> } return null ; } }
(以后我还是用JS写HOC组件吧)
Ref ref的全称是reference:,即引用
在下面两种情况下,你可能需要用到Ref
希望直接使用dom元素中的某个方法
或者希望直接使用自定义组件中的某个方法
Ref的使用规则如下
ref作用于内置的html组件时,得到的将是真实的dom对象
ref作用于类组件时,得到的将是类的实例
ref不能作用于函数组件
下面来看看怎么用ref
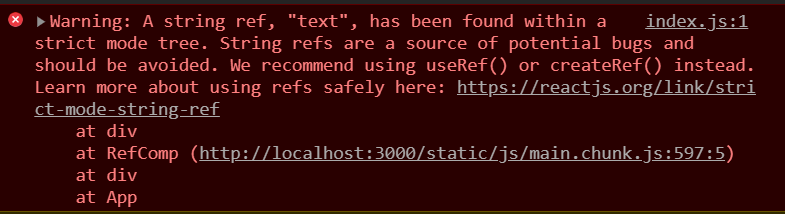
使用字符串(不再推荐) 1 2 3 4 5 6 7 8 9 10 11 12 13 14 15 16 17 18 19 20 21 import React from "react" ;import Style from "./FormComp.module.scss" class RefComp extends React .Component <any , any > handleClick = () => { this .refs.text.focus(); console .log(this .refs.text.value) } render ( return ( <div className={Style.wrapper}> <input type ="text" ref={"text" }/> <button onClick={this .handleClick}>聚焦</button> </div> ); } } export default RefComp;
效果如下,点击后焦点会到input框上
这种方式因为效率问题已经不推荐,在严格模式下甚至不能使用
使用对象 1 2 3 4 5 6 7 8 9 10 11 12 13 14 15 16 17 18 19 20 21 22 23 import React, {DOMElement, Ref, RefObject} from "react" ;import Style from "./FormComp.module.scss" class RefComp extends React .Component <any , any > private text : RefObject<HTMLInputElement> = React.createRef(); handleClick = () => { this .text.current.focus(); console .log(this .text.current.value) } render ( return ( <div className={Style.wrapper}> <input type ="text" ref={this .text}/> <button onClick={this .handleClick}>聚焦</button> </div> ); } } export default RefComp;
效果和上面差不多
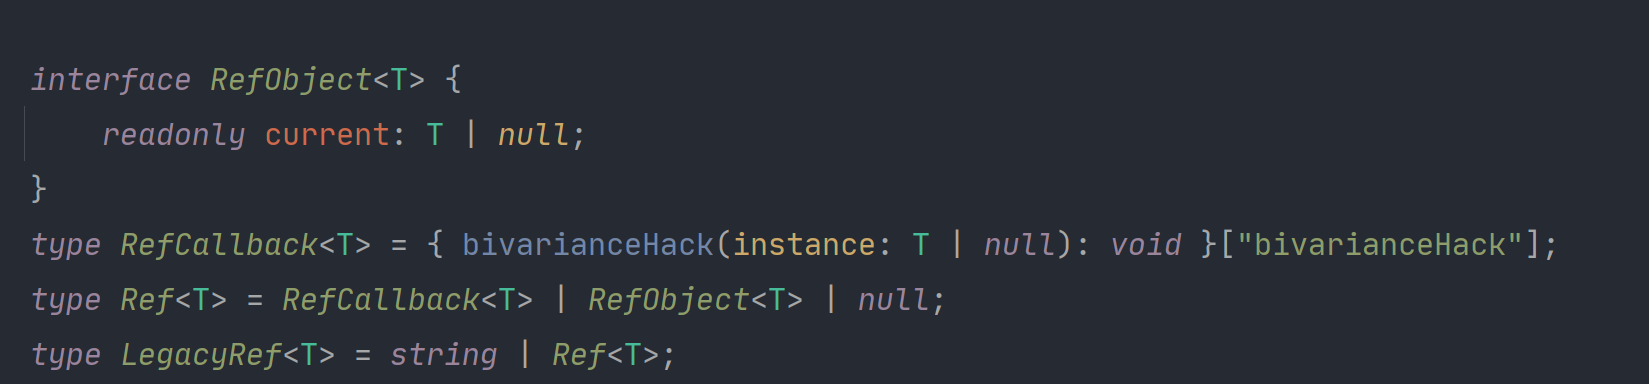
类型声明如下
使用函数 使用方法也很简单,看看就知道了
1 2 3 4 5 6 7 8 9 10 11 12 13 14 15 16 17 18 19 20 21 22 23 24 25 import React, {DOMElement, Ref, RefCallback, RefObject} from "react" ;import Style from "./FormComp.module.scss" class RefComp extends React .Component <any , any > private text : HTMLInputElement; handleClick = () => { console .log(this .text.value) } getTextRef = (el ) => { console .log("函数被调用了" , el); this .text = el; } render ( return ( <div className={Style.wrapper}> <input type ="text" ref={this .getTextRef} defaultValue={"rua" }/> <button onClick={this .handleClick}>聚焦</button> </div> ); } } export default RefComp;
另外,也许会疑惑,为什么要把获取ref单独做成一个函数写在类组件里面呢(而不是直接写在render里),这和这个函数的调用时机有关
componentDidMount的时候会调用该函数
在componentDidMount事件中可以使用ref
如果ref的值发生了变动(旧的函数被新的函数替代),分别调用旧的函数以及新的函数,时间点出现在componentDidUpdate之前
旧的函数被调用时,传递null
新的函数被调用时,传递对象
如果ref所在的组件被卸载,会调用函数
从第二点可以看出,如果直接写在render里,每次render时,虽然函数的操作是完全一样的,但是函数本身是重新创建了,所以会重新进行调用,如果想避免这种情况,就要把函数保存下来
Ref转发 Ref转发会在下面两种情况下用到
获取组件内部的某个元素 有时,我们在组件上写ref,不是想获取组件本身,而是想获取组件内部的某个元素
这时候就要用上ref转发了
对函数组件 使用转发
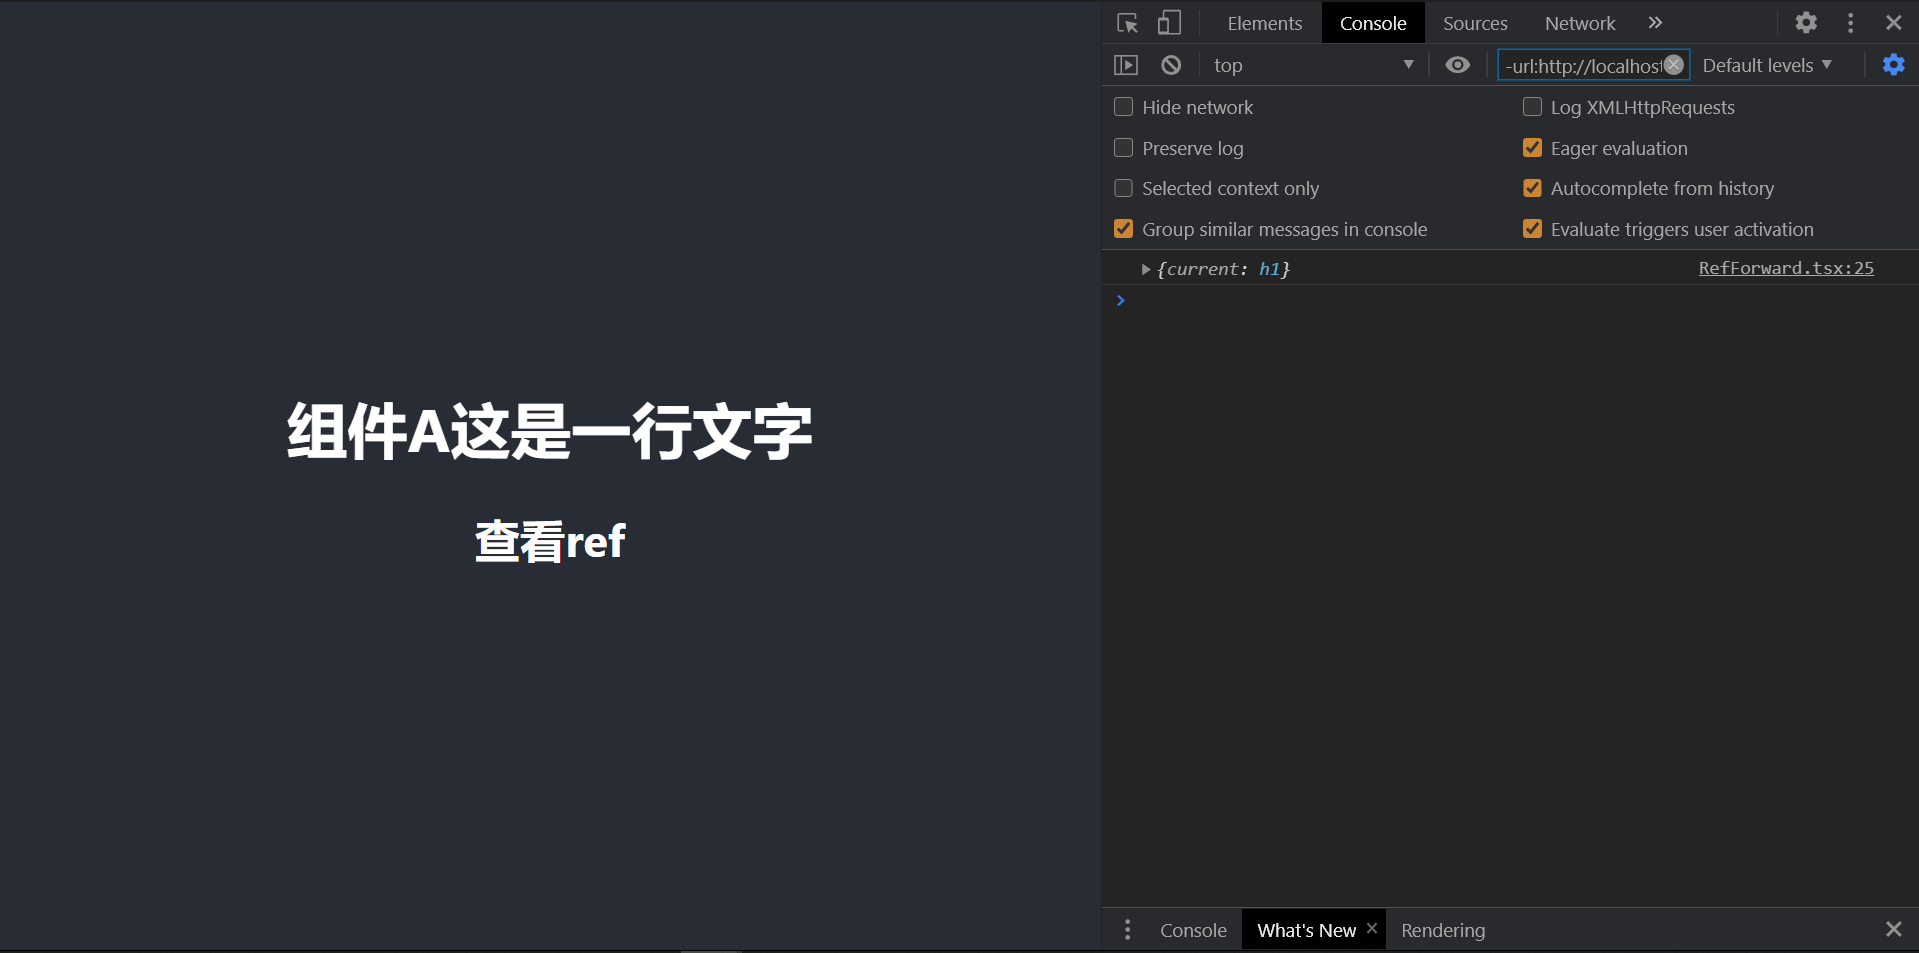
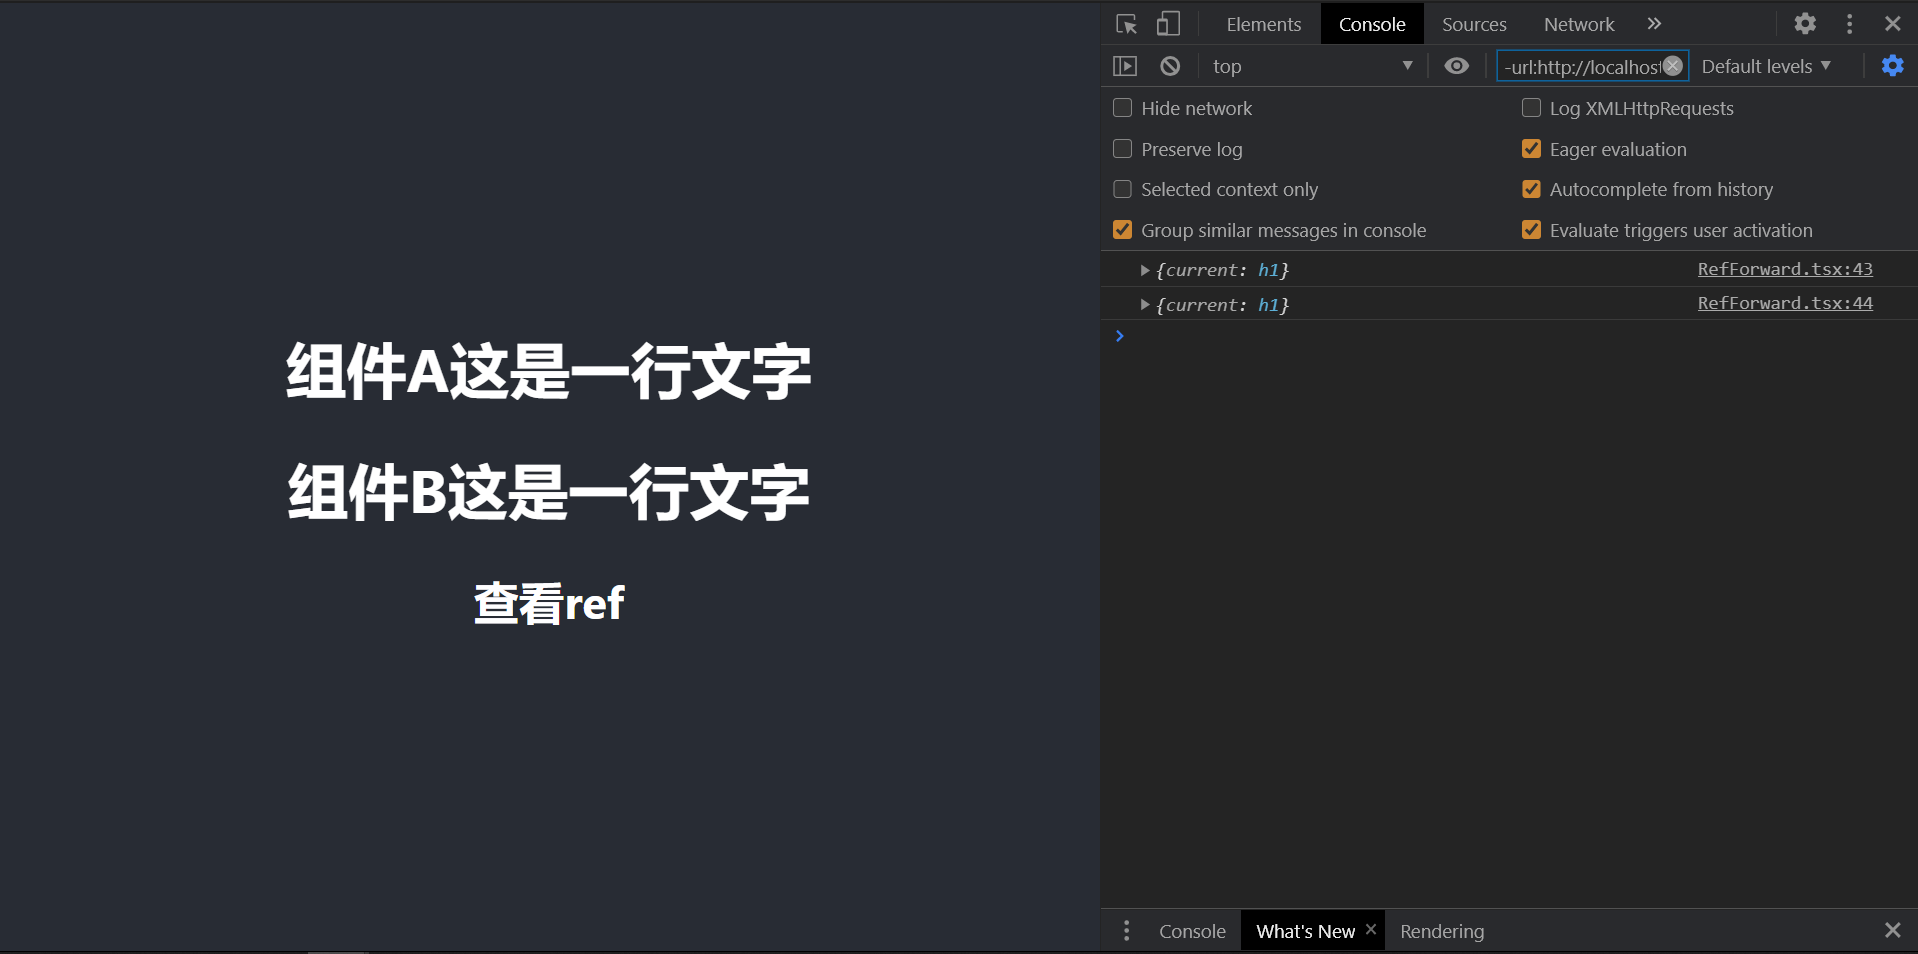
1 2 3 4 5 6 7 8 9 10 11 12 13 14 15 16 17 18 19 20 21 22 23 24 25 26 27 28 29 30 31 32 33 34 35 36 37 import React from "react" ;import {Ref} from "react" ;function A (props : any , ref : Ref<any > ) return <h1 ref ={ref} > 组件A <span > {props.words}</span > </h1 > } const NewA = React.forwardRef(A);export default class RefForward extends React .Component ARef = React.createRef() componentDidMount ( console .log(this .ARef); } handleClick = () => { console .log(this .ARef); } render ( return ( <div> <NewA ref={this .ARef} words="这是一行文字" /> <h2 onClick={this .handleClick}>查看ref</h2> </div> ) } }
效果如下
对类组件使用转发,这个稍微复杂一点
使用forwardRef包装类组件
类组件留下一个自定义的props属性用来接收ref
接收后把它设置到其他的元素上
实际上就是把ref当成一个普通的属性来转发而已
高阶组件 在高阶组件里,我们希望ref时返回的是被包裹的组件,而不是高阶组件本身
就可以使用ref转发了
(这里为了好看就不用不用typescript了)
1 2 3 4 5 6 7 8 9 10 11 12 13 14 15 16 17 18 19 20 21 22 23 24 25 export default function withLog (Comp, CompName ) class LogWrapper extends React .Component componentDidMount ( console .log(`日志:组件${CompName} 被创建了!${Date .now()} ` ); } componentWillUnmount ( console .log(`日志:组件${CompName} 被销毁了!${Date .now()} ` ); } render ( const { forwardRef, ...rest } = this .props; return ( <> <Comp ref={forwardRef} {...rest} /> </> ) } } return React.forwardRef((props, ref ) => { return <LogWrapper {...props } forwardRef ={ref} /> }) }
1 2 3 4 5 6 7 8 9 10 11 12 13 14 15 16 17 18 19 import React from 'react' import { A } from "./components/Comps" ;import withLog from "./HOC/withLog" ;let AComp = withLog(A);export default class App extends React .Component myRef = React.createRef(); componentDidMount ( console .log(this .myRef); } render ( return ( <div> {} <AComp ref={this .myRef} a={1 } /> </div> ) } }
PureComponent PureComponent和Component几乎完全相同,但是PureComponent通过prop和state的浅比较来实现shouldComponentUpdate,某些情况下可以用PureComponent提升性能
所谓浅比较(shallowEqual),即react源码中的一个函数,然后根据下面的方法进行是不是PureComponent的判断,帮我们做了本来应该我们在shouldComponentUpdate中做的事情
1 2 3 if (this ._compositeType === CompositeTypes.PureClass) { shouldUpdate = !shallowEqual(prevProps, nextProps) || ! shallowEqual(inst.state, nextState); }
当shouldComponentUpdate返回false,就不会运行render函数生成虚拟DOM
另外,浅比较有一个问题就是,若是数组和对象等引用类型,则要引用不同,才会渲染(为什么不进行深比较呢,因为深比较比较耗费性能,PureComponent本身就是为了优化性能,如果用了深比较,反而性能还变差了)
所以,你不能写下面的代码
1 2 3 4 this .state.obj.n = 1 ;this .setState({ ...this.state })
如果你写了上面的代码(就是直接修改了对象或者数组内的元素),组件就不会重新渲染
所以我们更希望你使用不可变的对象,也就是永远创建新的状态覆盖之前的状态
1 2 3 4 5 6 7 this .setState({ ...this.state, obj : { ...this.state.obj, n : 1 } })
另外,你可以使用Immutable.js这个库来创建不可变对象
另外,PureComponent只对类组件有效
1 2 3 class IndexPage extends PureComponent }
如果你想对函数式组件使用PureComponent,可以使用React.memo,他的原理大概是这样的
1 2 3 4 5 6 7 8 9 10 function memo (Comp ) return class Memo extends PureComponent render ( return (<> {Comp(this.props)} </> ) } } }
是不是很easy
Context 说实话,这玩意我从来没用过orz,我一般都用的redux做数据共享orz,可能是我没用react做过什么大项目吧,不过还是介绍一下
Context是上下文的意思,你可以理解成一个运行环境
什么时候需要用到Context呢
如上面的组件树中,A组件与B组件之间隔着非常多的组件,假如A组件希望传递给B组件一个属性,那么不得不使用props将属性从A组件历经一系列中间组件最终跋山涉水传递给B组件。这样代码不仅非常的麻烦,更重要的是中间的组件可能压根就用不上这个属性,却要承担一个传递的职责,这是我们不希望看见的。Context出现的目的就是为了解决这种场景,使得我们可以直接将属性从A组件传递给B组件。
Context现在有两套API,我们都来简单看一看
旧版API 这里所说的老版本Context指的是React16.3之前的版本所提供的Context属性,这种Context是以一种协商声明的方式使用的。作为属性提供者(Provider)需要显式声明哪些属性可以被跨层级访问并且需要声明这些属性的类型。而作为属性的使用者(Consumer)也需要显式声明要这些属性的类型。
下面用一下官方的例子
1 2 3 4 5 6 7 8 9 10 11 12 13 14 15 16 17 18 19 20 21 22 23 24 25 26 27 28 29 30 31 32 33 34 35 36 37 38 39 40 41 42 43 44 45 46 47 48 49 50 51 52 53 54 55 56 57 58 59 60 61 62 63 64 import React, {Component} from 'react' ;import PropTypes from 'prop-types' ;class Button extends React .Component static contextTypes = { color: PropTypes.string }; constructor (props, context ) super (props, context); } render ( return ( <button style={{background : this .context.color}}> {this .props.children} </button> ); } } function ButtonFuncComp (props, context ) return ( <button style={{background : this .context.color}}> {this .props.children} </button> ); } ButtonFuncComp.contextTypes = { color: PropTypes.string }; class Message extends React .Component render ( return ( <div> {this .props.text} <Button>Delete</Button> </div> ); } } class MessageList extends React .Component static childContextTypes = { color: PropTypes.string }; getChildContext ( return {color : "red" }; } render ( const children = this .props.messages.map((message ) => <Message text={message.text} /> ); return <div > {children}</div > } }
另外,如果一个组件处在多个上下文中,而且提供的数据冲突了
获取的数据遵循就近覆盖原则
一个组件不会获取到自身提供的上下文,只会提供到其他组件提供的上下文
总结一下就是:
如果要使用上下文中的数据,组件必须有一个静态属性 contextTypes,该属性描述了需要获取的上下文中的数据类型
可以在组件的构造函数中,通过第二个参数,获取上下文数据
类组件中可以通过组件的context属性中获取
在函数组件中,通过第二个参数,获取上下文数据
另外,上下文中的数据是不可以直接变化的,需要通过状态变化,如果你需要子组件可以修改上下文的数据,可以在上下文中加入一个处理函数,在处理函数中调用setState
但是事实上,官方不推荐使用Context,为什么呢?
首先Context的使用是与React可复用组件的逻辑背道而驰的,在React的思维中,所有组件应该具有复用的特性,但是正是因为Context的引入,组件复用的使用变得严格起来。就以上面的代码为例,如果想要复用Button组件,必须在上层组件中含有一个可以提供String类型的colorContext,所以复用要求变得严格起来。并且更重要的是,当你尝试修改Context的值时,可能会触发不确定的状态。我们举一个例子,我们将上面的MessageList稍作改造,使得Context内容可以动态改变:
1 2 3 4 5 6 7 8 9 10 11 12 13 14 15 16 17 18 19 20 21 22 23 24 25 26 27 28 29 30 31 32 33 34 35 class MessageList extends React .Component state = { color: "red" }; static childContextTypes = { color: PropTypes.string }; getChildContext ( return {color : this .state.color}; } render ( const children = this .props.messages.map((message ) => <Message text={message.text} /> ); return ( <div> <div>{children}</div> <button onClick={this ._changeColor}>Change Color</button> </div> ); } _changeColor = () => { const colors = ["red" , "green" , "blue" ]; const index = (colors.indexOf(this .state.color) + 1 ) % 3 ; this .setState({ color: colors[index] }); } }
上面的例子中我们MessageList组件Context提供的color属性改成了state的属性,当每次使用setState刷新color的时候,子组件也会被刷新,因此对应按钮的颜色也会发生改变,一切看起来是非常的完美。但是一旦组件间的组件存在生命周期函数ShouldComponentUpdate那么一切就变得诡异起来。我们知道PureComponent实质就是利用ShouldComponentUpdate避免不必要的刷新的,因此我们可以对之前的例子做一个小小的改造:
1 2 3 4 5 6 7 8 9 class Message extends React .PureComponent render ( return ( <div> {this .props.text} <Button>Delete</Button> </div> ); } }
你会发现即使你在MessageList中改变了Context的值,也无法导致子组件中按钮的颜色刷新。这是因为Message组件继承自PureComponent,在没有接受到新的props改变或者state变化时生命周期函数shouldComponentUpdate返回的是false,因此Message及其子组件并没有刷新,导致Button组件没有刷新到最新的颜色。
新版API 新的Context发布于React 16.3版本,相比于之前组件内部协商声明的方式,新版本下的Context大不相同,采用了声明式的写法,通过render props的方式获取Context,不会受到生命周期shouldComponentUpdate的影响。上面的例子用新的Context改写为:
1 2 3 4 5 6 7 8 9 10 11 12 13 14 15 16 17 18 19 20 21 22 23 24 25 26 27 28 29 30 31 32 33 34 35 36 37 38 39 40 41 42 43 44 45 46 47 48 49 50 51 52 53 54 55 56 57 import React, {Component} from 'react' ;const ThemeContext = React.createContext({ theme : 'red' });class Button extends React .Component render ( return ( <ThemeContext.Consumer> {({color} ) => { return ( <button style={{background : color}}> {this .props.children} </button> ); }} </ThemeContext.Consumer> ); } } class Message extends React .PureComponent render ( return ( <div> {this .props.text} <Button>Delete</Button> </div> ); } } class MessageList extends React .Component state = { theme: { color : "red" } }; render ( return ( <ThemeContext.Provider value={this .state.theme}> <div> {this .props.messages.map((message ) => <Message text ={message.text}/ > <button onClick={this ._changeColor}>Change Color</button> </div> </ThemeContext.Provider> ) } _changeColor = () => { const colors = ["red" , "green" , "blue" ]; const index = (colors.indexOf(this .state.theme.color) + 1 ) % 3 ; this .setState({ theme: { color: colors[index] } }); } }
我们可以看到新的Context使用React.createContext的方式创建了一个Context实例,然后通过Provider的方式提供Context值,而通过Consumer配合render props的方式获取到Context值,即使中间组件中存在shouldComponentUpdate返回false,也不会导致Context无法刷新的问题,解决了之前存在的问题。我们看到在调用React.createContext创建Context实例的时候,我们传入了一个默认的Context值,该值仅会在Consumer在组件树中无法找到匹配的Provider才会使用,因此即使你给Provider的value传入undefined值时,Consumer也不会使用默认值。
新版的Context API相比于之前的Context API更符合React的思想,并且能解决componentShouldUpdate的带来的问题。与此同时你的项目需要增加专门的文件来创建Context。在 React v17 中,可能就会删除对老版 Context API 的支持,所以还是需要尽快升级。最后讲了这么多,但是在项目中还是要尽量避免Context的滥用,否则会造成组件间依赖过于复杂。
另外,这种方式使用Context也是可以的,不过仅限于类组件
1 2 3 4 5 6 7 8 9 10 11 12 13 14 15 16 17 18 19 20 21 22 23 24 25 26 27 28 29 30 31 32 33 34 35 36 37 38 39 40 41 42 43 44 45 46 47 48 49 50 51 52 53 54 55 56 57 58 59 import React, { Component } from 'react' const ctx = React.createContext();function ChildA (props ) return <div> <h1>ChildA</h1> <h2> <ctx.Consumer> {value =><> {value.a} {value.b}</> </ctx.Consumer> </h2> <ChildB /> </div> } class ChildB extends React .Component static contextType = ctx; render ( return <p> ChildB来自于上下文的数据: a: {this .context.a}, b :{this .context.b} <button onClick={() => { this .context.changeA(this .context.a + 2 ); }}>后代组件的按钮, 点击a+2 </button> </p> } } export default class NewContext extends Component state = { a: 0 , b: "abc" , changeA: (newA ) => { this .setState({ a: newA }) } } render ( return ( <ctx.Provider value={this .state}> <div> <ChildA /> <ChildB /> <button onClick={() => { this .setState({ a: this .state.a + 1 }) }}>父组件的按钮, a加1 </button> </div> </ctx.Provider> ) } }
另外,你要注意下面的事情
同一个Provider,不要用到多个组件中,如果需要在其他组件中使用该数据,应该考虑将数据提升到更高的层次
如果Context.Provider中的value属性发生变化(会使用Object.is比较引用地址),会导致该上下文的所有后代元素全部重新渲染,无论该子元素是否有优化(无论shouldComponentUpdate函数返回什么结果)
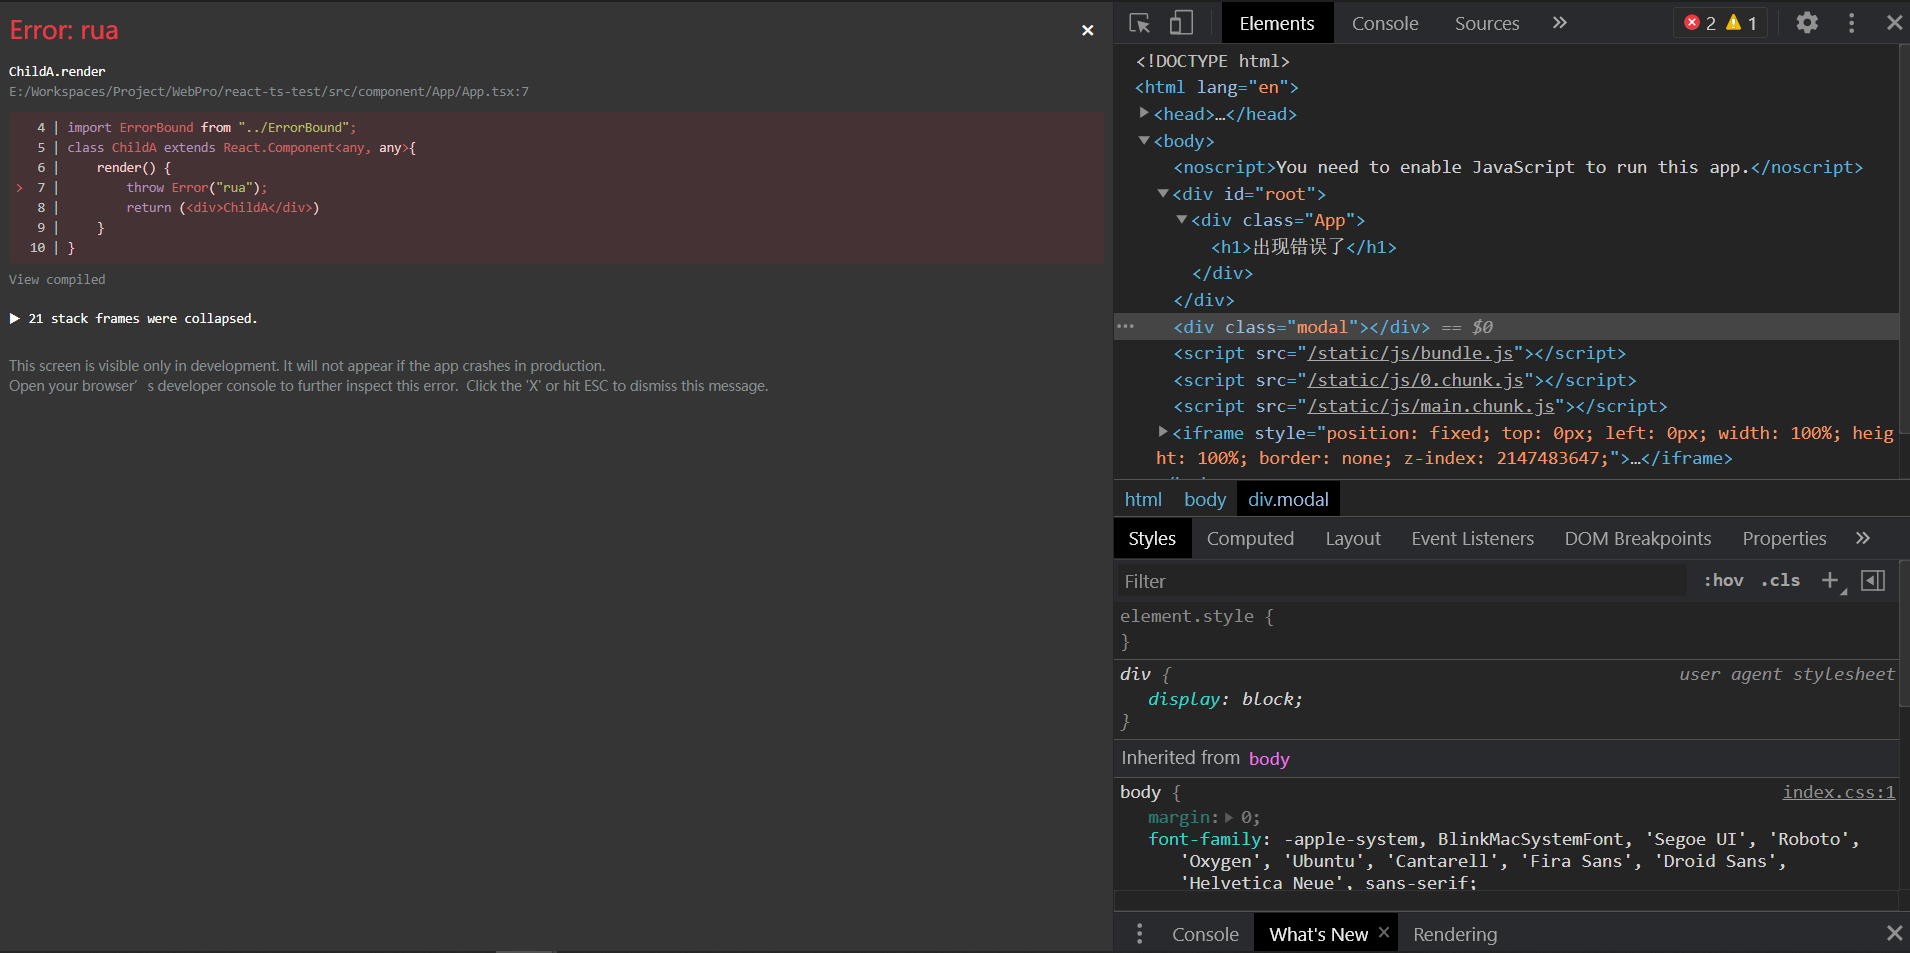
处理错误 默认情况下,若一个组件在渲染期间 (render内部)发生错误,会导致整个组件树全部被卸载
我们可以制作一个组件来处理这个问题,该组件会捕获到渲染期间(render)子组件发生的错误,并有能力阻止错误继续传播
1 2 3 4 5 6 7 8 9 10 11 12 13 14 15 16 17 18 19 20 21 22 23 24 25 26 27 28 import React, { PureComponent } from 'react' export default class ErrorBound extends PureComponent state = { hasError: false } static getDerivedStateFromError (error ) console .log("发生错误了" ); return { hasError: true } } componentDidCatch (error, info ) console .log("记录错误信息" ); } render ( if (this .state.hasError) { return <h1 > 出现错误了</h1 > } return this .props.children } }
1 2 3 4 5 6 7 8 9 10 11 12 13 14 15 16 import ErrorBound from "../ErrorBound" ;class ChildA extends React .Component <any , any > render ( throw Error ("rua" ); return (<div > ChildA</div > } } function App ( return ( <div className="App" > <ErrorBound> <ChildA/> </ErrorBound> </div> ); }
在处理错误的组件中,有两个生命周期函数可以用来处理错误
另外,它们只能捕获渲染期间的错误,下面几种错误是不能捕获的,只能使用try catch
Portals插槽
https://zh-hant.reactjs.org/docs/portals.html
插槽用于将一个React元素渲染到指定的DOM容器中,但是在组件树中保留原来的层级
使用方法为ReactDOM.createPortal(React元素, 真实的DOM容器),该函数返回一个React元素
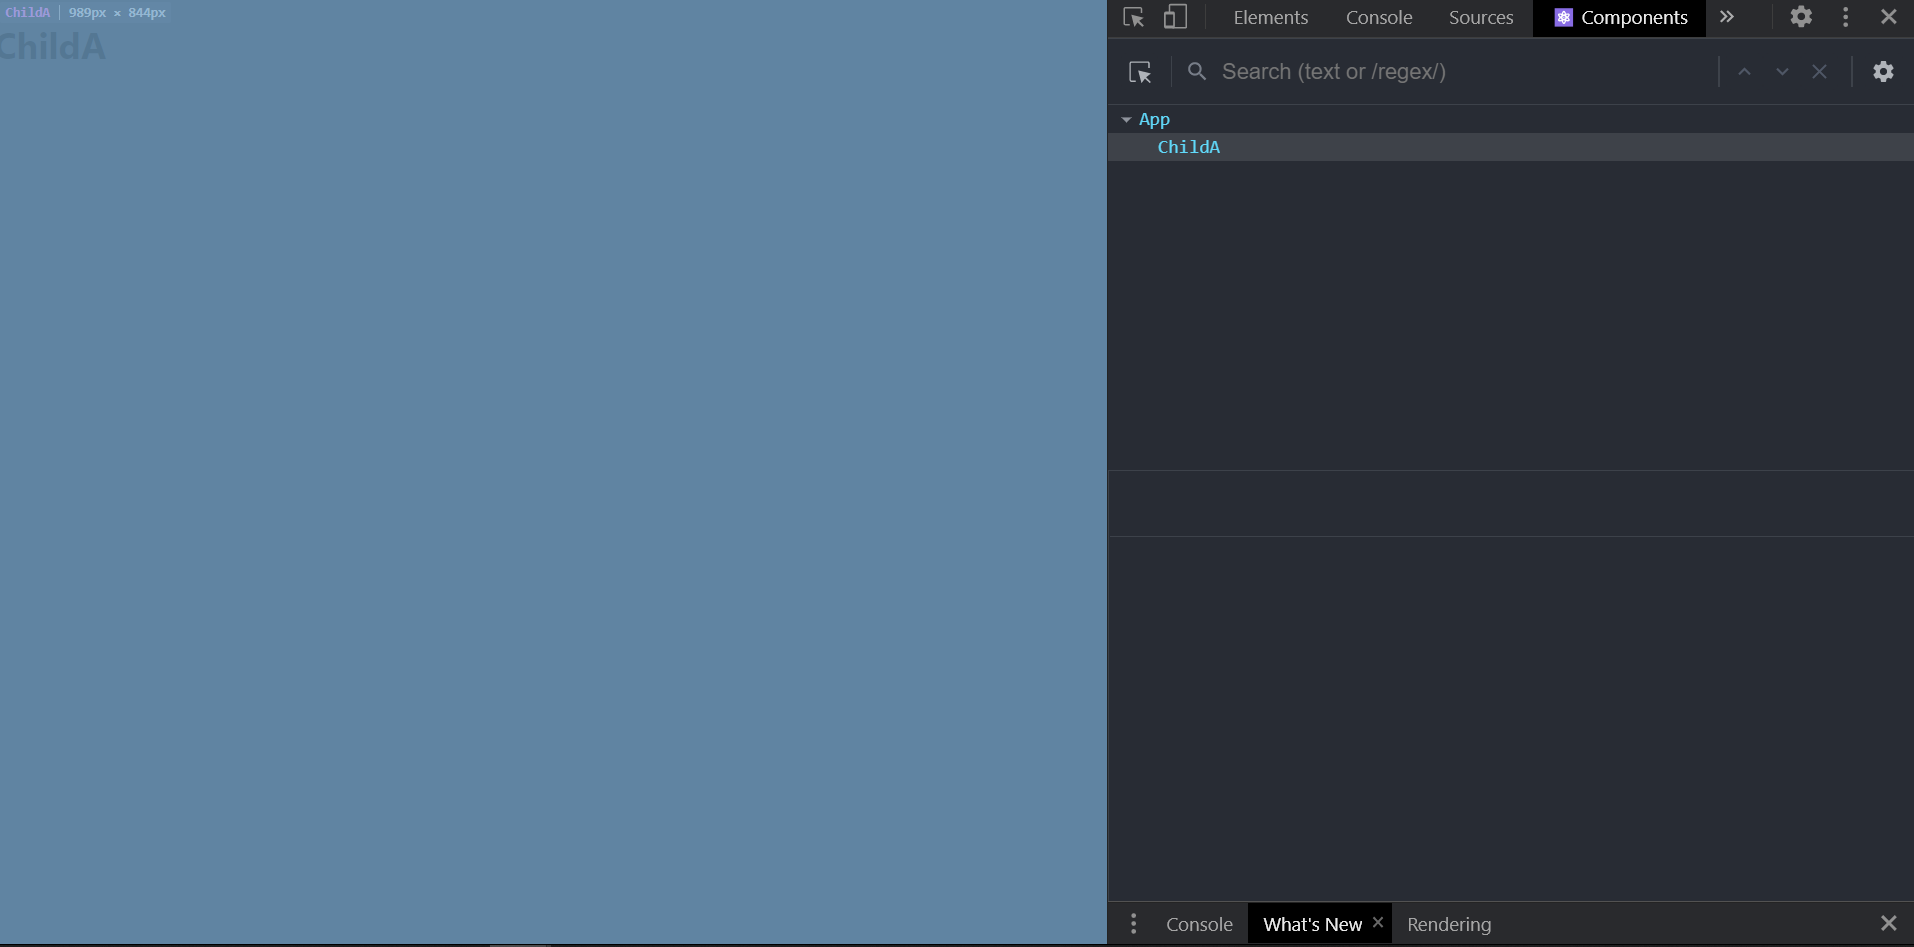
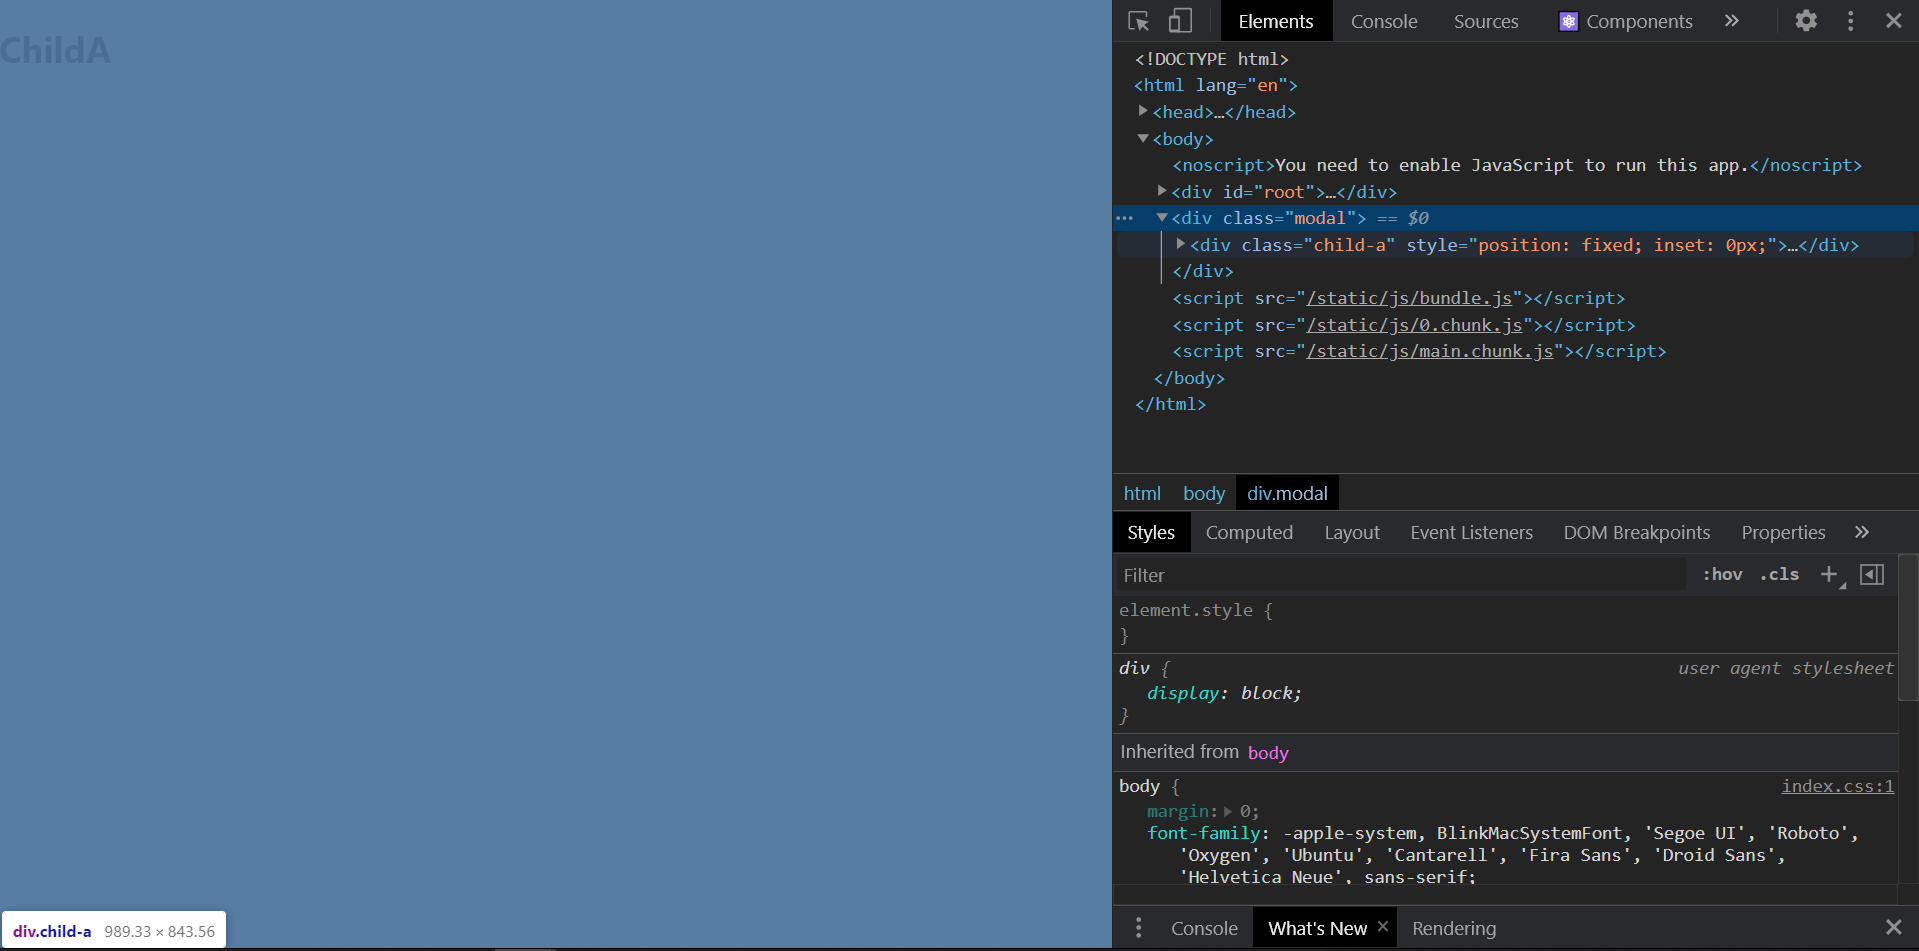
1 2 3 4 5 6 7 8 9 10 11 12 13 14 15 16 17 18 19 20 21 22 23 24 import React from 'react' ;import ReactDOM from "react-dom" ;import './App.css' ;function ChildA ( return ReactDOM.createPortal(<div className ="child-a" style ={{ position : "fixed", top : "0", left : "0", right : "0", bottom : "0" }}> <h1 > ChildA</h1 > </div > , document .querySelector(".modal" ));} function App ( return ( <div className="App" > <ChildA/> </div> ); } export default App;
运行结果
另外,你要注意一下事件冒泡,React中的事件是包装过的,它的事件冒泡是根据虚拟DOM树来冒泡的,与真实的DOM树无关。所以如果你在App组件中绑定了点击事件,然后在model组件设置了点击事件,点击model组件后一样会触发app的点击事件
React中的事件 这里的事件是指React内置的DOM组件中的事件
比如下面这种
1
2
3
( <button onClick={() => {}}></button> )
概括一下重点就是
React会给document注册事件,只有当事件冒泡到document上时,React才会根据组件树进行处理(根据虚拟DOM树调用事件处理函数)
几乎所有的元素的事件处理,均在document的事件中处理,除了下面类型的事件
一些不冒泡的事件,是直接在元素上监听(比如onFocus)
一些document上面没有的事件,直接在元素上监听(比如H5播放器的onPlay)
React的事件参数,并非真实的DOM事件参数,是React合成的一个对象,该对象类似于真实DOM的事件参数
topPropagation,阻止事件在虚拟DOM树中冒泡
nativeEvent,可以得到真实的DOM事件对象
为了提高执行效率,React使用事件对象池来处理事件对象
附带一些注意事项
如果给真实的DOM注册事件,阻止了事件冒泡,则会导致react的相应事件无法触发(因为事件绑定在document上)
如果给真实的DOM注册事件,事件会先于React事件运行
通过React的事件对象阻止事件冒泡,无法阻止真实的DOM事件冒泡
可以通过nativeEvent.stopImmediatePropagation(),阻止document上剩余事件的执行
在事件处理程序中,不要异步的使用事件对象,如果一定要使用,需要调用event.persist函数来持久化对象
上面的事情知道一下就行,其实用的也不多orz
开启严格模式 React.StrictMode是一个组件,该组件不进行UI渲染(React.Fragment <> </>),它的作用是,在渲染内部组件时,会对内部不规范的代码进行检测
识别不安全的生命周期
识别过时字符串 ref API
识别废弃的 findDOMNode 方法的警告
检测过时的 context API
检测意外的副作用
React要求,副作用代码仅出现在以下生命周期函数中
ComponentDidMount
ComponentDidUpdate
ComponentWillUnMount
在严格模式下,虽然不能监控到具体的副作用代码,但它会将不能具有副作用的函数调用两遍,以便发现问题。(这种情况,仅在开发模式下有效)
后记 好水啊orz,其实我也不知道写点什么orz,可能真的是我没做过什么项目也没看过react源码的问题吧www