前言
这是react系列的学习笔记2,介绍一下,React中的一些基本概念,看完后你就可以简单的使用React了
JSX
babel-jsx : https://babeljs.io/docs/en/#jsx-and-react
说到react,就必须要先介绍一下JSX了
JSX是Facebook起草的JS扩展语法,在React中广泛被使用,它的基本语法和HTML差不多,但是又有一些Vue模板的功能,比如下面的例子
1
2
3
4
5
6
7
8
9
10
11
12
13
14
15
16
17
18
19
20
21
22
23
24
25
26
27
28
29
30
31
32
33
34
35
36
37
38
39
40
41
42
43
44
45
46
| const span = (<span>我是一个span元素</span>);
const lis = arr.map((item, i) => {
return (<li key={i}>{item}</li>);
});
const obj = {name : "sakura"};
const time = 0;
setInterval(() => {
console.log("重新渲染");
time++;
divElement = (
{}
{}
{}
<>
<p>这是段落</p>
{}
<input type="text"/>
{}
<p>{a} * {b} = {a * b}</p>
{}
<p>{null}{undefined}{false}</p>
{}
<p>
{span}
</p>
{}
{[1, 2, 3, 4, undefined, null]}
{}
{}
{lis}
{}
{}
<img alt="" className={"img"}
style={{
{}
width: "400px",
marginRight: "20px"
}} src="https://blog.sakura-snow.com/image/background/index-bg.jpg"/>
{div}
{time}
</>
);
ReactDOM.render(divElement, document.getElementById("root"));
},1000);
|
是不是非常简单,当然有些规则你记不住也无所谓(毕竟最常用的就那几条),反正到时多报几次错就知道了2333
汇总一下常用的规则如下
- 每个JSX表达式,有且仅有一个根节点,如果你想平行渲染多个标签,使用<React.Fragment><React.Fragment/>
- 你可以在JSX中嵌入表达式,类似于JS的模板字符串,你只需要用{}把它包起来就行
- 数字,字符串,数组可以嵌入并正常显示
- null、undefined、false,true不会显示
- 可以放置React元素对象,但不能放置普通对象
- 表达式可以作为元素属性
- 表达式里的属性使用小驼峰命名法
这些规则在上面的例子中均有演示,注意一下即可
另外,你还要知道这些JSX是怎么生效的,其实,JSX会被babel编译成React.createElement(所以,你在使用JSX时,一定要import一下React)
1
2
3
4
5
6
| function createElement<P extends {}>
(
type: FunctionComponent<P> | ComponentClass<P> | string,
props?: Attributes & P | null,
...children: ReactNode[]
) : ReactElement<P>;
|
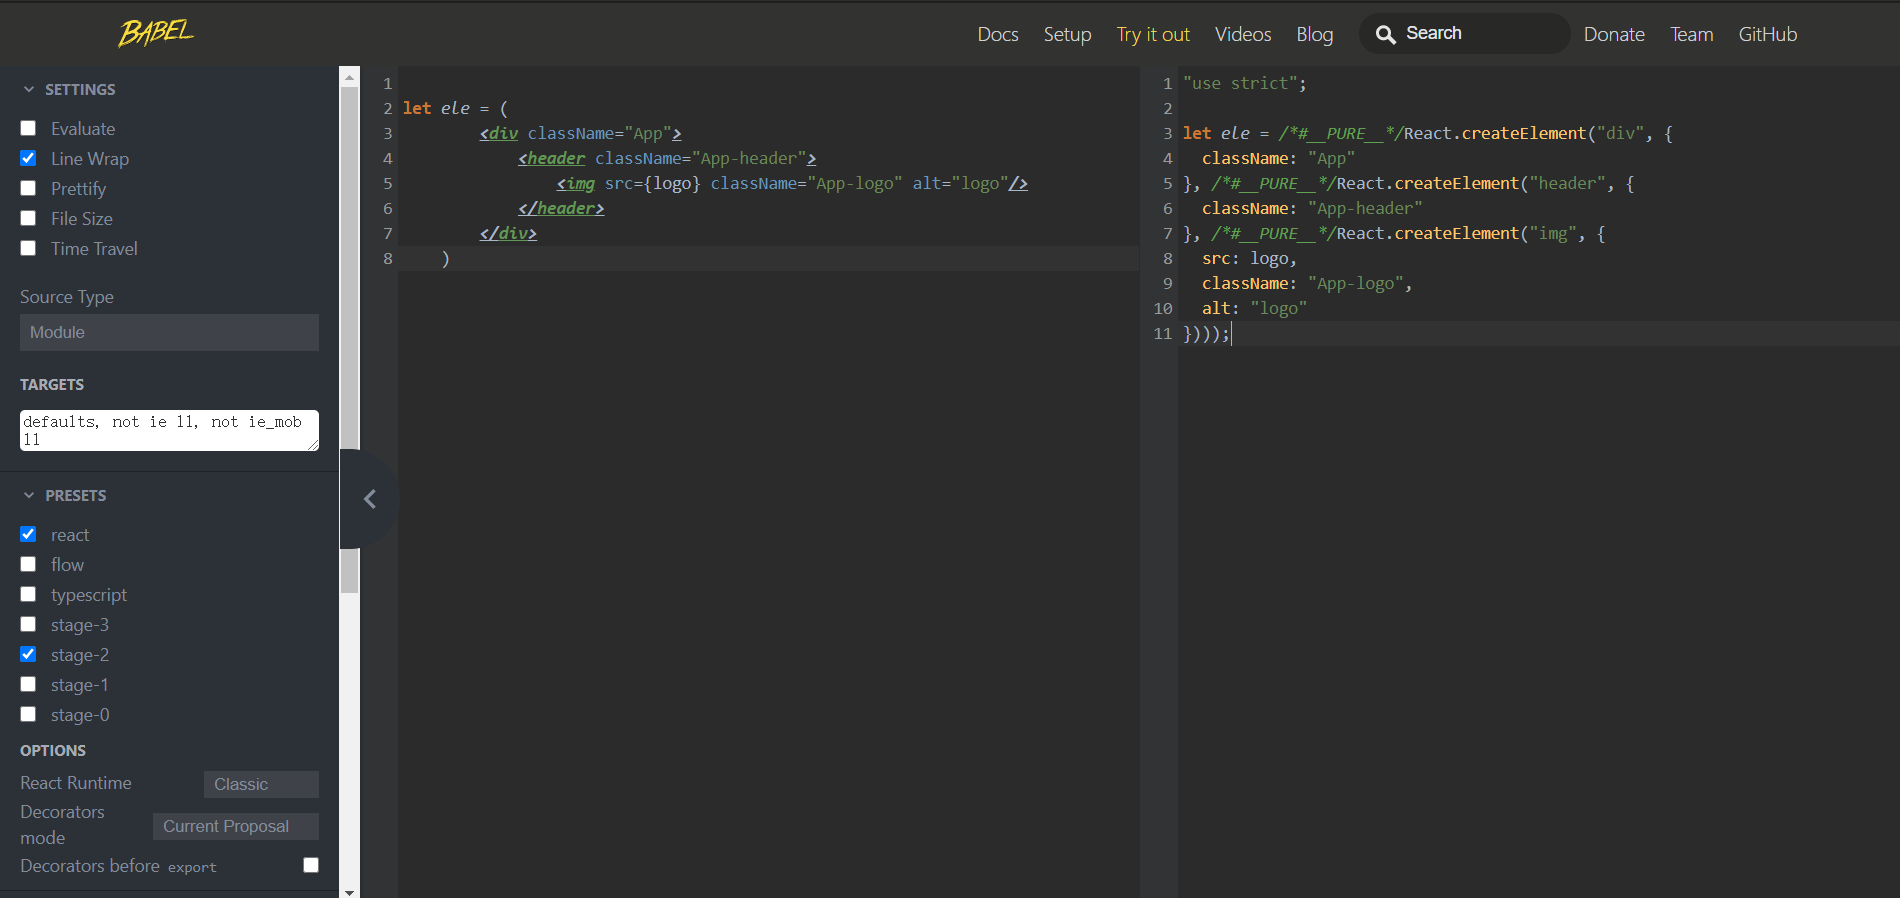
你可以在这里自己动手试一下
顺带一提,React.createElement创建出的对象都是不可变的,不能进行任何的修改,只能重新创建
组件属性
组件是一个包含内容、样式和功能的UI单元
React中有两种组件,一种是函数式组件,一种是类组件
1
2
3
4
5
6
7
8
9
10
11
12
13
14
15
16
17
18
19
20
21
22
23
24
25
26
27
28
| import React from "react";
class Counter extends React.Component {
constructor(props) {
super(props);
}
render() {
return (
<div className={"counter"}>{this.props.number}</div>
)
}
}
function FuncCounter(props) {
return (
<div className={"counter"}>
{props.number}
</div>
)
}
export default Counter;
export {FuncCounter}
|
它们都可以接收外部传来的props
1
2
3
4
5
6
7
8
9
10
11
12
13
14
| import React from 'react';
import './App.css';
import Counter, {FuncCounter} from "../Counter/Counter";
function App() {
return (
<div className="App">
<Counter number={1}/>
<FuncCounter number={1}/>
</div>
);
}
export default App;
|
可以看出
- 对于函数组件,属性会作为一个对象的属性,传递给函数的参数
- 对于类组件,属性会作为一个对象的属性,传递给构造函数的参数
另外,根据React单向数据流的思想,子组件无法修改父组件传来的属性
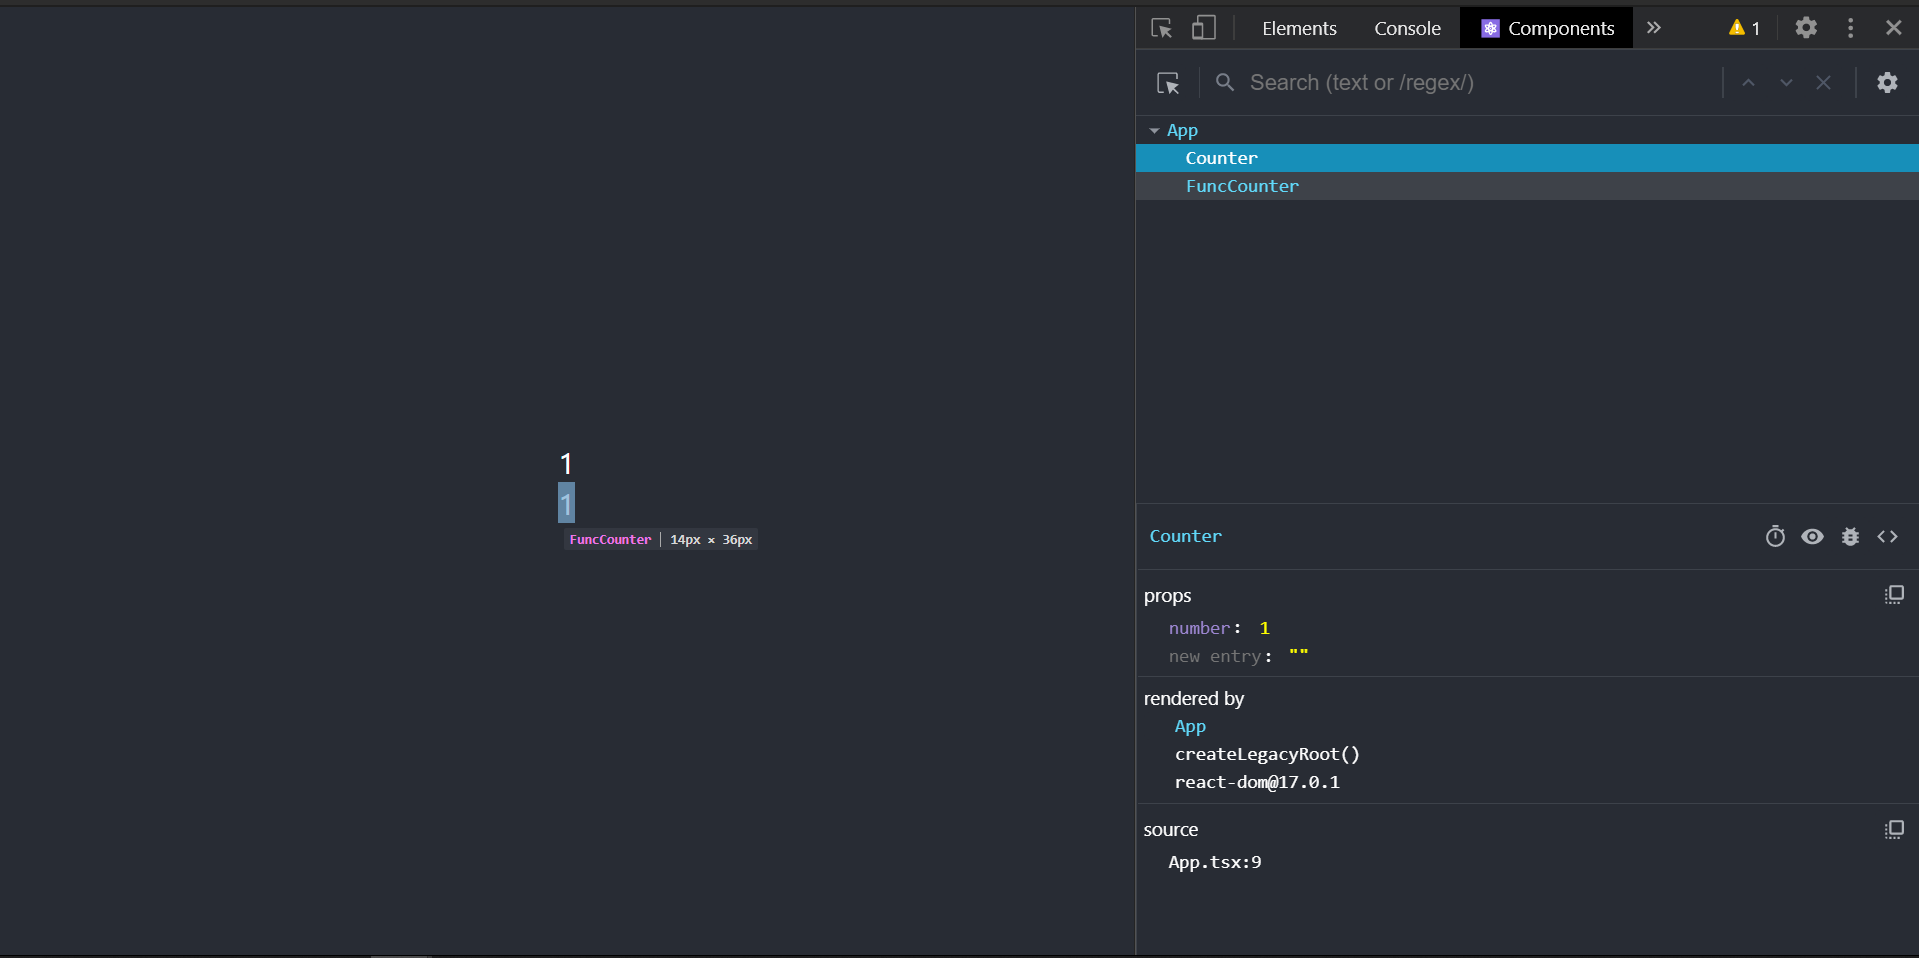
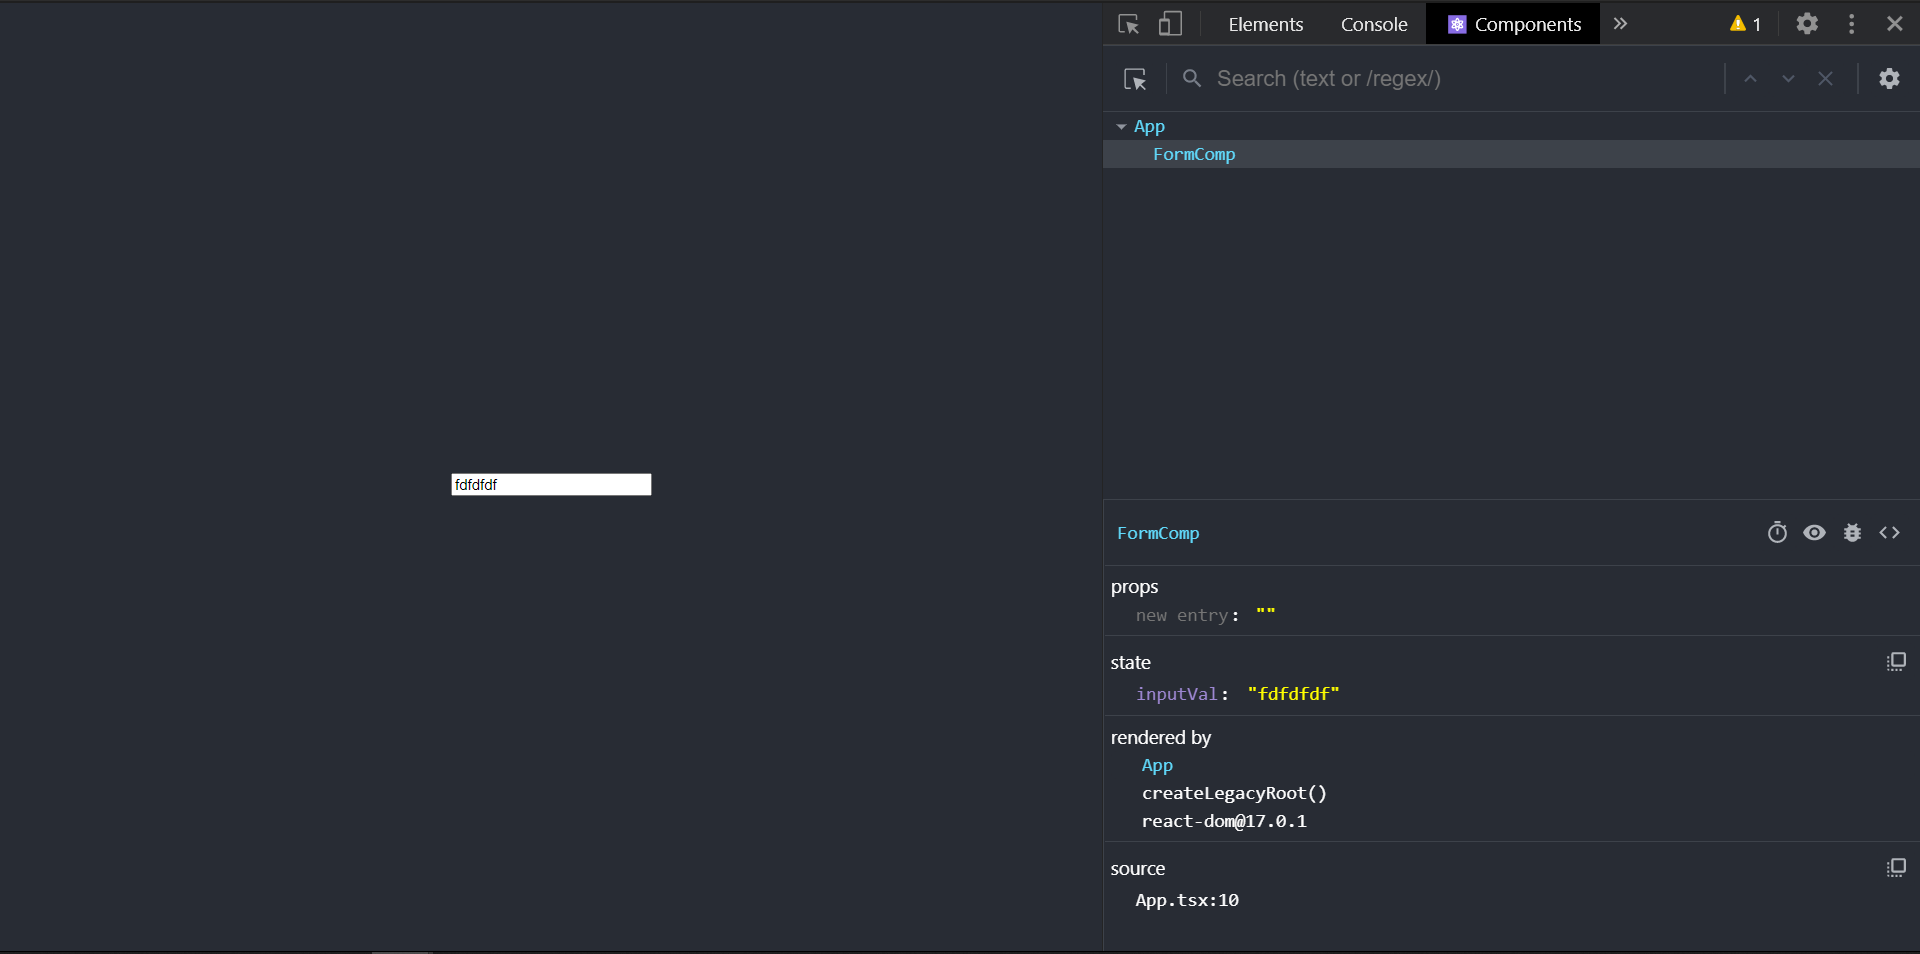
PS:React为Chrome提供了开发者工具
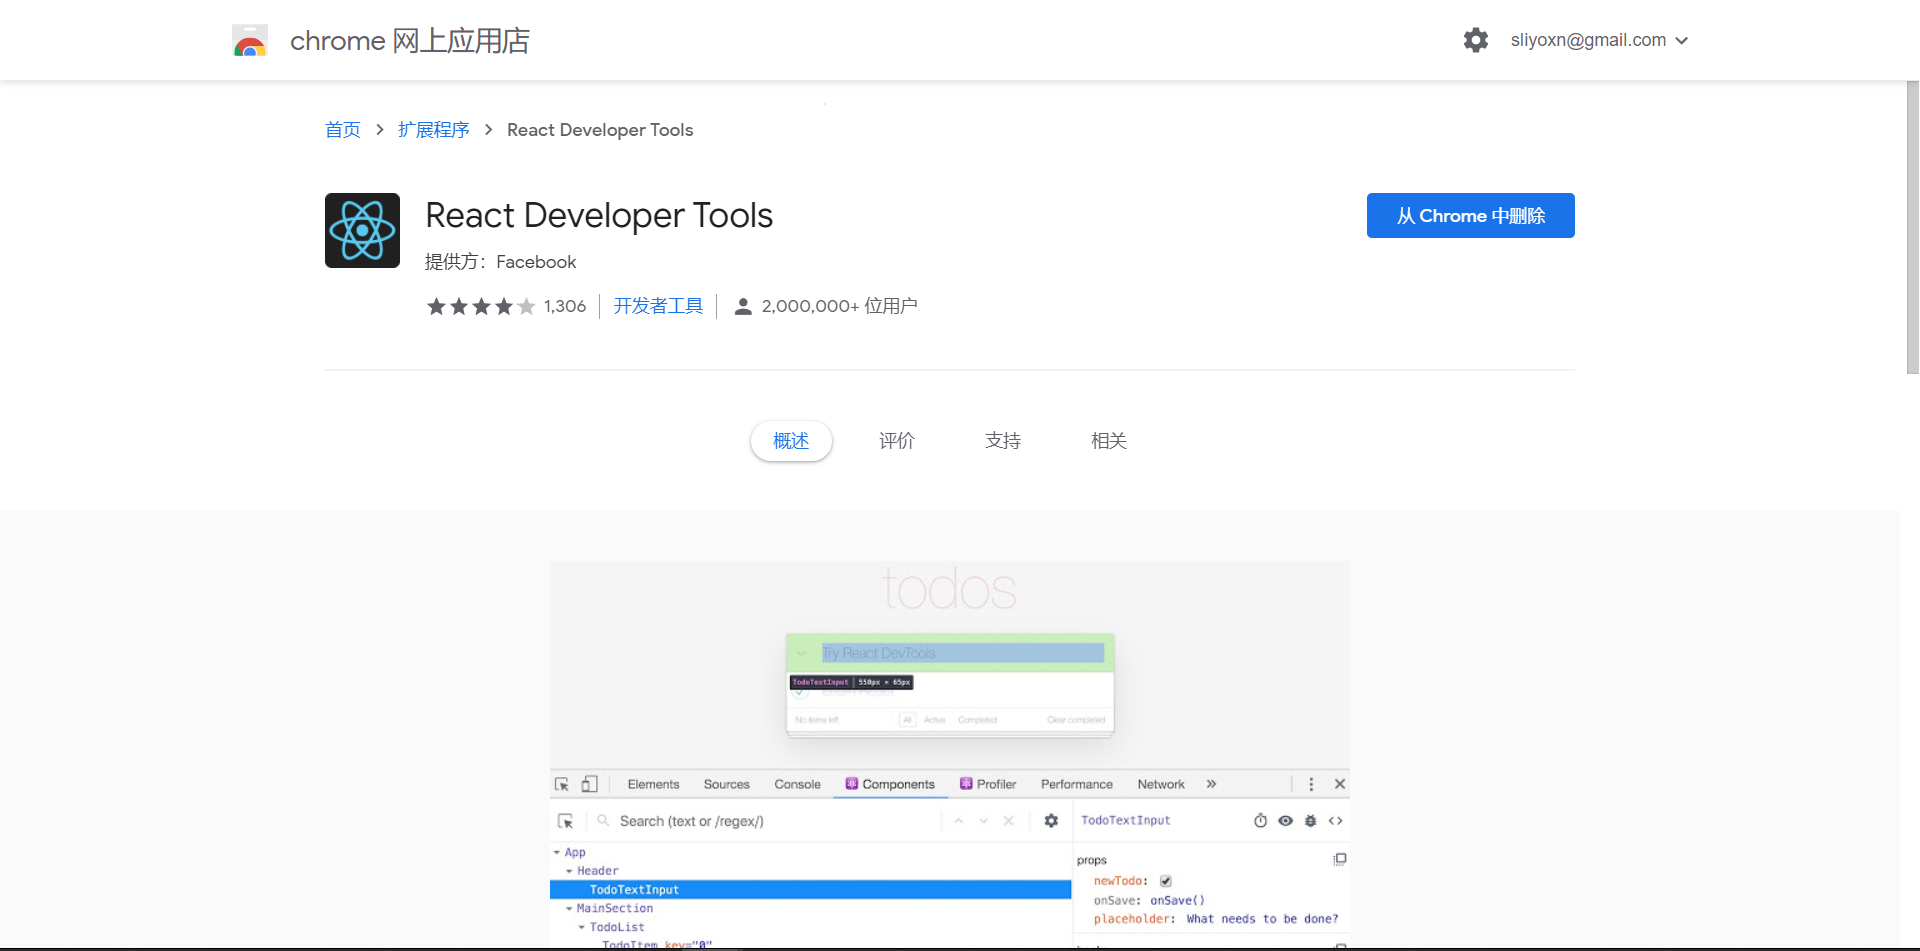
你可以下载他来查看当前的组件树,还有组件的属性和状态
组件状态
另外,一个组件除了父组件传递过来的属性,还要有自身的一些状态(除非这个组件的功能只有渲染)
这个状态就是state
状态初始化
1
2
3
4
5
6
7
8
9
10
11
12
13
14
15
16
17
18
19
20
21
22
23
|
class Counter extends React.Component {
state = {
number : this.props.number
}
constructor(props) {
super(props);
}
render() {
return (
<div className={"counter"}>{this.props.number}</div>
)
}
}
|
可以看到,我们可以用声明或者在构造函数中初始化state,这个state就是组件自生的数据
状态修改
和Vue不一样,如果你修改state中的数据,页面是不会更新的
如果你要在修改state时刷新页面,就要使用setState方法
一旦调用了this.setState,就会导致当前组件重新渲染(所以有时不能直接修改state也不是好事,比如设置timer时可以不用重新)
1
2
3
4
5
6
7
8
9
10
11
12
13
14
15
16
17
18
19
20
21
22
23
24
25
26
27
28
29
30
31
32
33
34
35
36
37
38
39
40
41
42
43
44
45
46
47
48
49
|
import React from "react";
interface IProps {
number : number
}
interface IState {
number : number;
timer ?: number;
}
class Tick extends React.Component<IProps, IState> {
readonly state : Readonly<IState> = {
number : this.props.number,
timer : undefined
}
constructor(props : any) {
super(props);
}
componentDidMount() {
let timer : any = setInterval(() => {
this.setState({
number : this.state.number + 1
})
}, 1000);
this.setState({
timer
})
}
render() {
return (
<div className={"counter"}>
<span className={"text"}>{this.state.number}</span>
</div>
)
}
}
export default Tick;
|
对比一下props和state
- props:该数据是由组件的使用者传递的数据,所有权不属于组件自身,因此组件无法改变该数组
- state:该数组是由组件自身创建的,所有权属于组件自身,因此组件有权改变该数据
setState的一些问题
其实简单来说就是,setState有两个问题
- setState对状态的修改,可能是异步执行的(如果改变状态的代码处于某个HTML元素的事件中,则其是异步的,否则是同步)
- React会对异步的setState进行优化,将多次setState进行合并(将多次状态改变完成后,再统一对state进行改变,然后触发render)
举个例子,假如我们有下面的代码
1
2
3
4
5
6
7
8
9
10
11
12
13
14
15
16
17
18
19
20
21
22
23
| class Comp extends React.Component<any, any> {
state = {
num : 0
}
handleClick = () => {
this.setState({
num : this.state.num + 1
})
console.log(this.state.num)
}
render() {
console.log("render")
return (
<>
<p>{this.state.num}</p>
<button onClick={this.handleClick}>点我</button>
</>
)
}
}
|
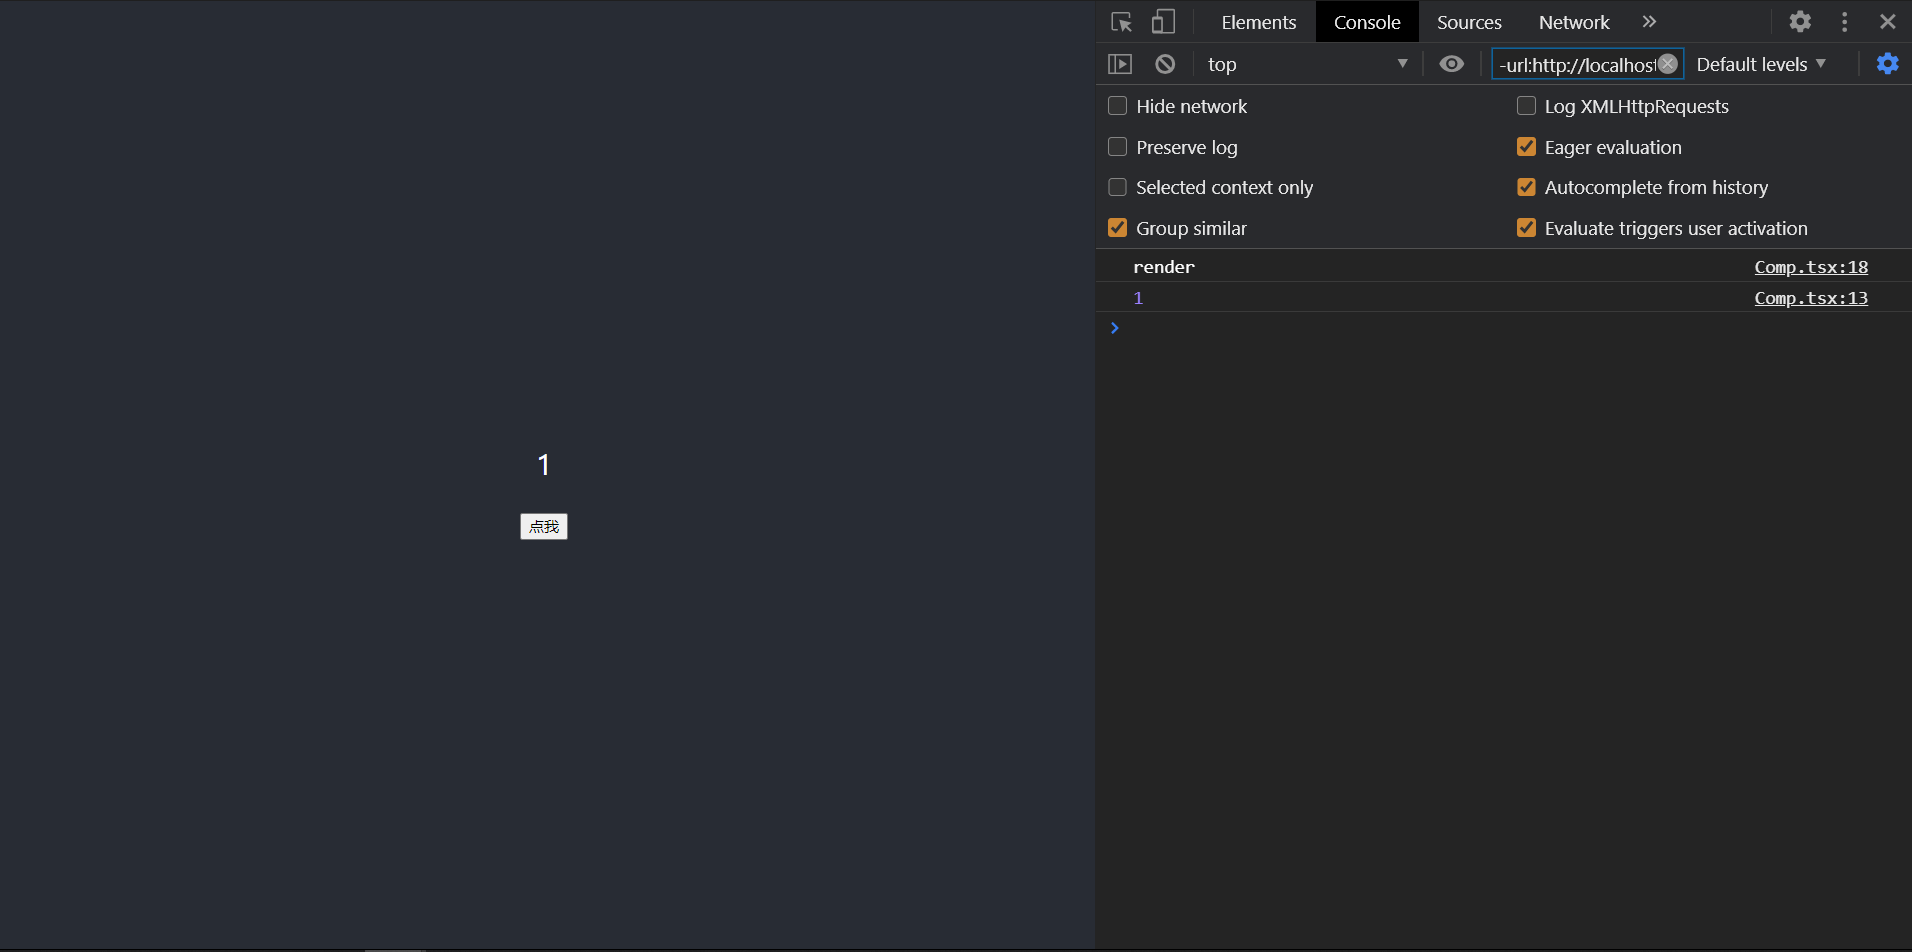
如果你按了一下按钮,页面的打印结果如下

可以看到,state实际上没有马上更新
所以,我们要介绍一点新的操作
如果要使用改变之后的状态,需要使用回调函数
这个回调函数会在render后运行
比如下面的代码
1
2
3
4
5
6
7
| handleClick = () => {
this.setState({
num : this.state.num + 1
}, () => {
console.log(this.state.num)
})
}
|
如果新的状态要根据之前的状态进行运算,使用函数的方式改变状态
如果setState的第一个参数不是一个对象而是一个函数,这个函数在执行时会通过参数被传入prevState,也就是之前的状态,而返回值就会和state进行合并
1
2
3
4
5
6
7
8
9
10
11
12
13
14
15
16
17
18
19
| handleClick = () => {
this.setState((prevState : any) => {
return {
num : prevState.num + 1
}
}, () => {
console.log(this.state.num)
})
this.setState((prevState : any) => {
return {
num : prevState.num + 1
}
})
this.setState((prevState : any) => {
return {
num : prevState.num + 1
}
})
}
|
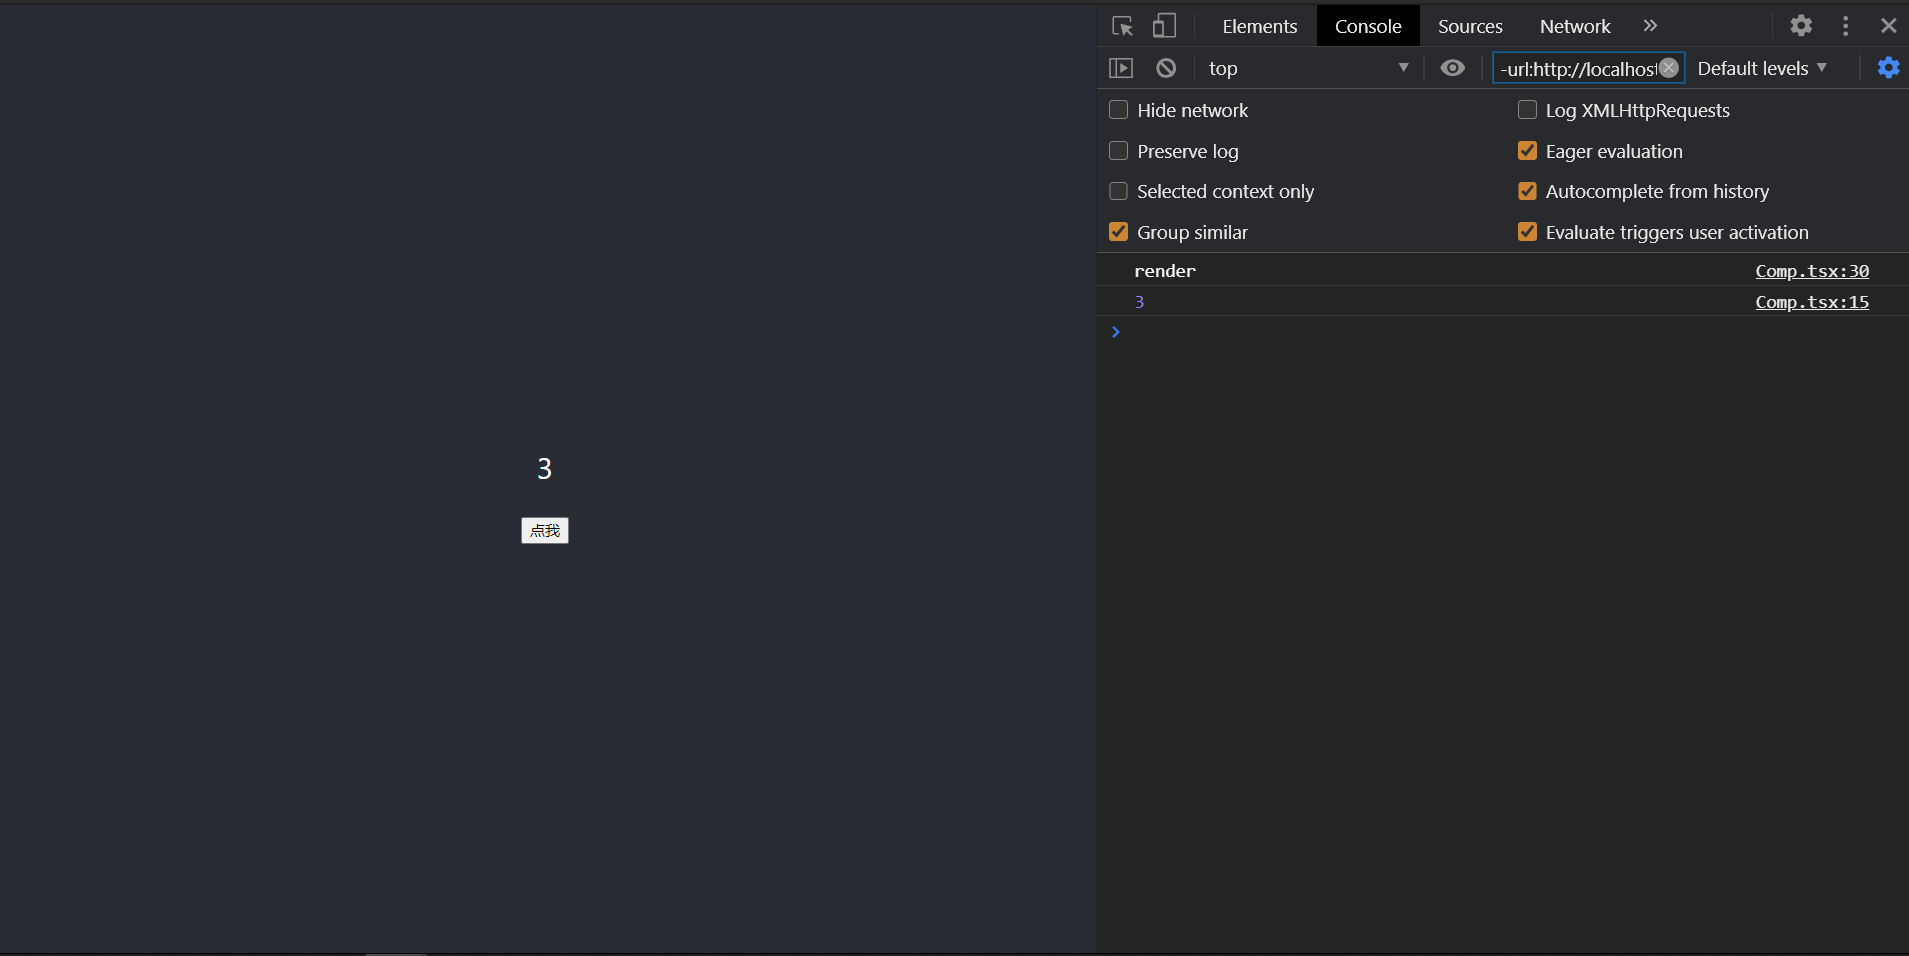
另外要注意的是,回调函数不是在那次的setState执行后执行的,而是等所有setState执行后,组件render后才执行的
组件事件
在React中,事件有两种,一个是原生事件,一个是自定义事件
原生事件
假如我们要用我们的Tick组件实现倒计时的功能,而且支持暂停,那我们就可以编写下面的代码
1
2
3
4
5
6
7
8
9
10
11
12
13
14
15
16
17
18
19
20
21
22
23
24
25
26
27
28
29
30
31
32
33
34
35
36
37
38
39
40
41
42
43
44
45
46
47
48
49
50
|
class Tick extends React.Component<IProps, IState> {
readonly state : Readonly<IState> = {
number : this.props.number,
timer : undefined
}
constructor(props : any) {
super(props);
}
componentDidMount() {
this.resume();
}
parse = () => {
clearInterval(this.state.timer);
}
resume = () => {
this.parse();
let timer : any = setInterval(() => {
this.setState({
number : this.state.number -1
})
}, 1000);
this.setState({
timer
})
}
render() {
return (
<div className={"counter"}>
<span className={"text"}>{this.state.number}</span>
<div>
<button onClick={this.parse}>暂停</button>
</div>
<div>
<button onClick={this.resume}>继续</button>
</div>
</div>
)
}
}
|
这里我们新增了两个按钮,并且绑定了click事件,如果React检测出这是浏览器支持的原生事件,就会把它绑定到DOM上
并且把它从props中去掉

另外,你要注意一下,事件的this默认指向undefined,如果你想让事件指向组件实例,就要经过特殊的处理,一般的处理方式有两种
自定义事件
不是原生的事件就都是自定义事件了,假如我们希望组件在倒计时到0时,通知一下父组件,我们就可以使用自定义事件
1
2
3
4
5
6
7
8
9
10
11
12
13
14
15
16
17
18
19
20
21
22
23
24
25
26
27
28
29
30
31
32
33
34
35
36
37
38
39
40
41
42
43
44
45
46
47
48
49
50
51
52
53
54
55
56
57
58
59
60
61
62
63
64
65
66
67
68
69
70
71
72
| import React from "react";
interface IProps {
number : number,
onOver ?: Function
}
interface IState {
number : number;
timer ?: number;
}
class Tick extends React.Component<IProps, IState> {
readonly state : Readonly<IState> = {
number : this.props.number,
timer : undefined
}
constructor(props : any) {
super(props);
console.log(props)
}
componentDidMount() {
this.resume();
}
parse = () => {
clearInterval(this.state.timer);
}
resume = () => {
this.parse();
if (this.state.number === 0) return;
let timer : any = setInterval(() => {
if (this.state.number === 0) {
clearInterval(timer);
if (this.props.onOver) {
this.props.onOver();
}
return;
}
this.setState({
number : this.state.number -1
})
}, 1000);
this.setState({
timer
})
}
render() {
return (
<div className={"counter"}>
<span className={"text"}>{this.state.number}</span>
<div>
<button onClick={this.parse}>暂停</button>
</div>
<div>
<button onClick={this.resume}>继续</button>
</div>
</div>
)
}
}
|
1
2
3
4
5
6
7
8
9
10
11
12
13
14
15
16
|
import React from 'react';
import './App.css';
import Tick from "../Tick/Tick";
function App() {
return (
<div className="App">
<Tick number={10} onOver={() => {
console.log("倒计时结束");
}}/>
</div>
);
}
export default App;
|
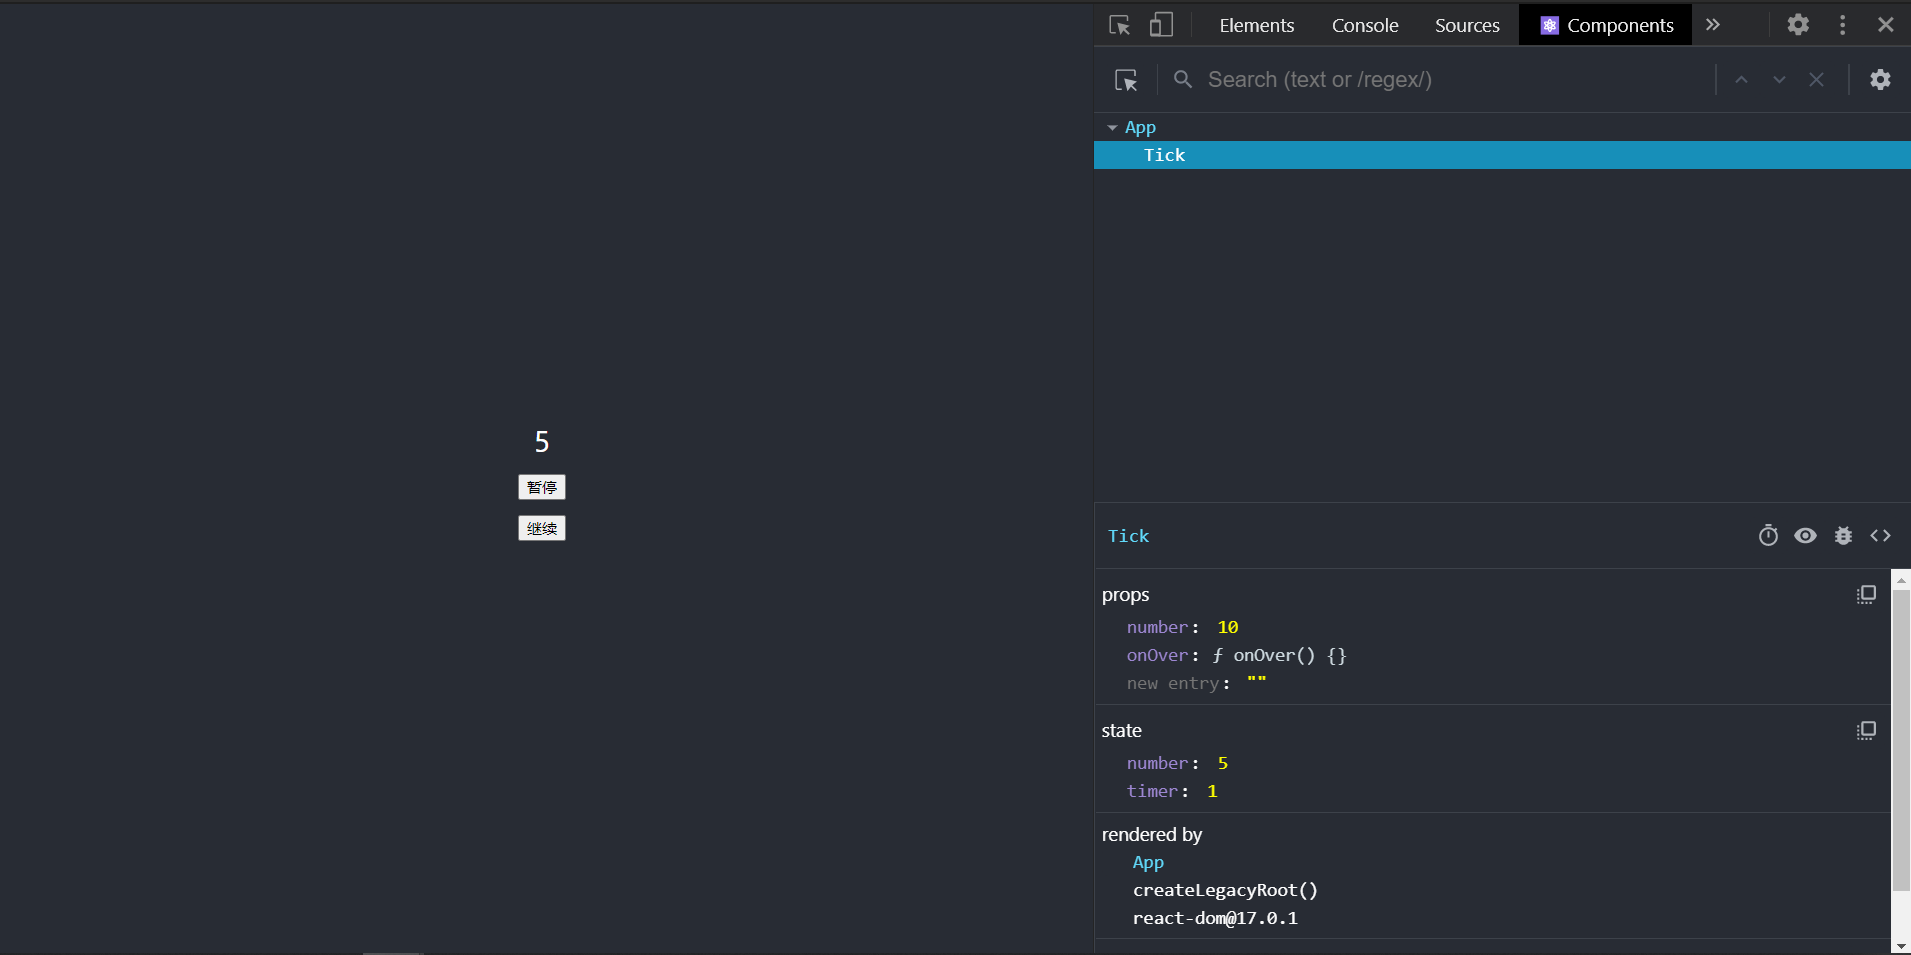
可以看到,自定义事件本质上只是一个普通的props属性,我们可以从props中看出来,React实际上只是把它当成了一个函数类型的props属性来处理而已
表单
这里我们先介绍一下受控组件和非受控组件的概念
- 受控组件:组件的使用者,有能力完全控制该组件的行为和内容。通常情况下,受控组件往往没有自身的状态,其内容完全收到属性的控制。
- 非受控组件:组件的使用者,没有能力控制该组件的行为和内容,组件的行为和内容完全自行控制。
而表单组件,默认情况下是非受控组件,一旦设置了表单组件的value属性,则其变为受控组件(单选和多选框需要设置checked)
比如说,有下面的代码
1
2
3
4
5
6
7
8
9
10
11
12
| import React from "react";
class FormComp extends React.Component<any, any> {
render() {
return (
<div>
<input/>
</div>
);
}
}
|
这里渲染出来的就是一个普通的表单组件,它是非受控的,而如果我们稍微修改一下
1
2
3
4
5
6
7
8
9
10
11
12
13
14
15
16
17
18
19
20
| import React from "react";
interface IState {
inputVal : string
}
class FormComp extends React.Component<any, IState> {
state = {
inputVal: ""
}
render() {
return (
<div>
<input value={this.state.inputVal}/>
</div>
);
}
}
|
这时候,input的内容完全由外部控制,它也就变成了一个受控组件
另外,这时候控制台会报一个错
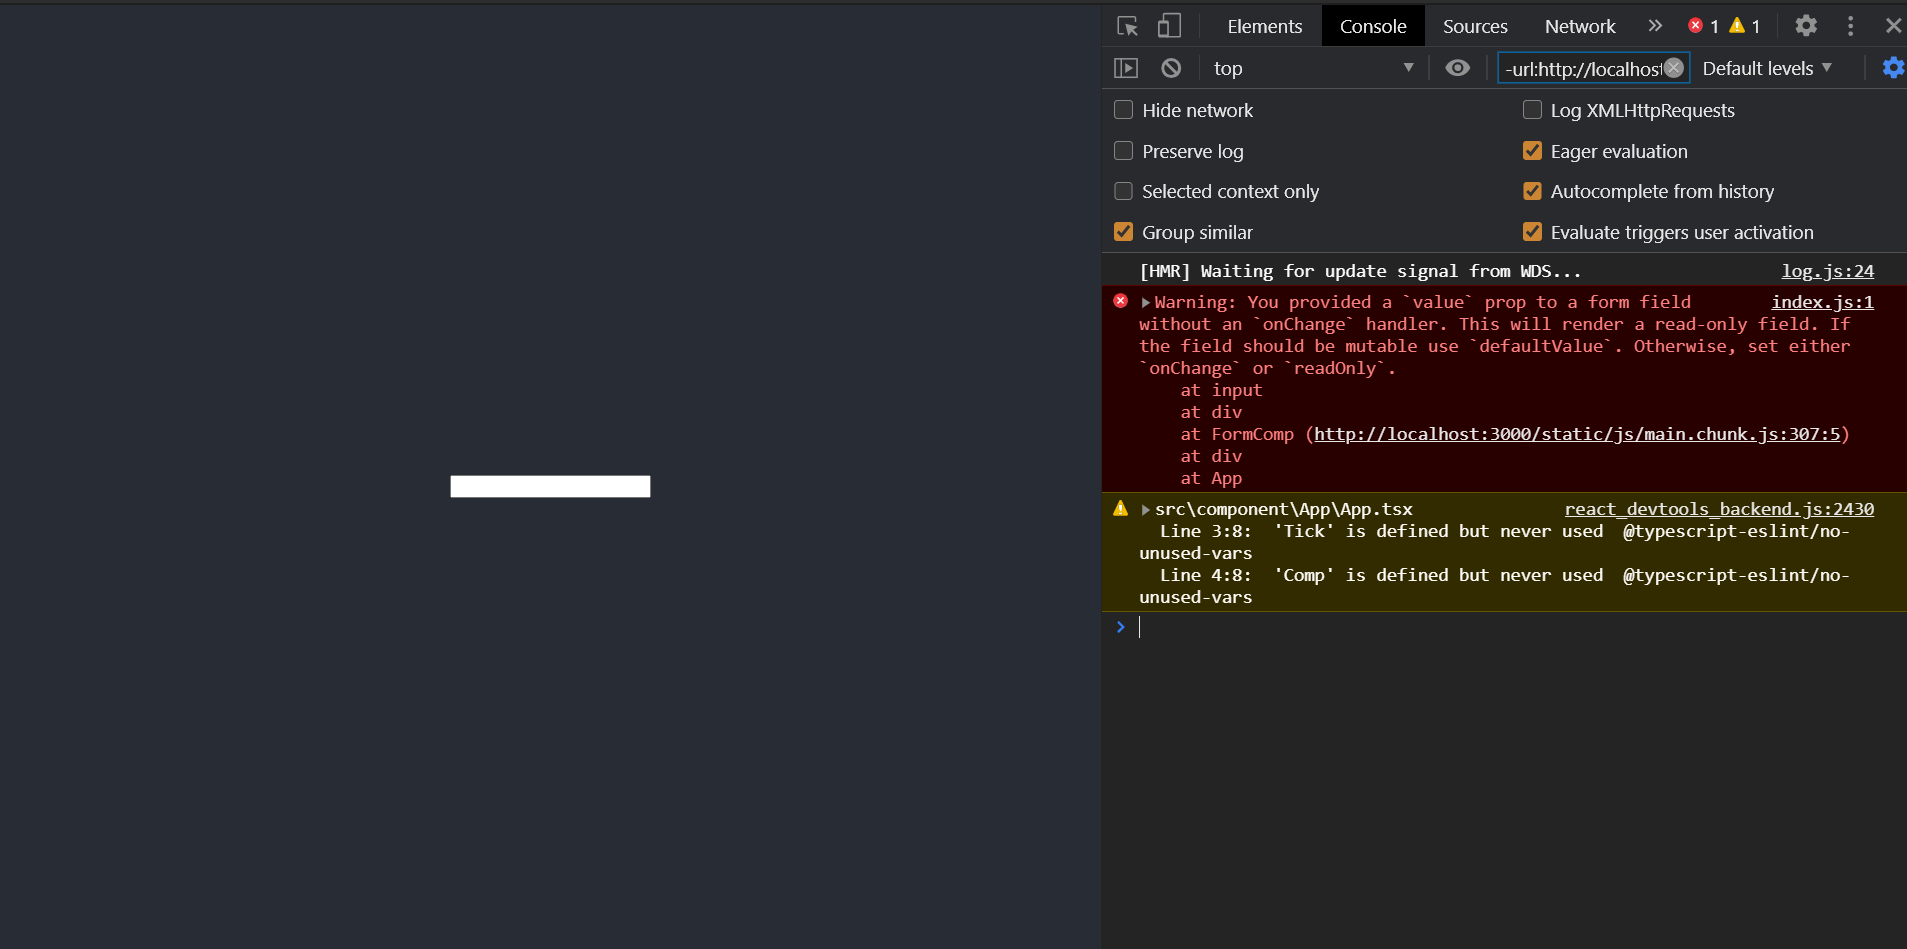
这是因为,react发现我们没有设置对应的操作来控制它,我们可以设置一个onChange事件
1
2
3
4
5
6
7
8
9
10
11
12
13
14
15
16
17
18
19
20
21
22
23
24
25
26
| interface IState {
inputVal : string
}
class FormComp extends React.Component<any, IState> {
state = {
inputVal: ""
}
updateInputVal(val : string) {
this.setState({
inputVal : val
})
}
render() {
return (
<div>
<input value={this.state.inputVal} onChange={event => {
this.updateInputVal(event.target.value);
}}/>
</div>
);
}
}
|
这时候input框里的内容可以随着state的值更新而改变了
顺带一提,从上面的报错中我们可以看出
- 如果只是想给input框设置默认值,应该使用
defaultValue
- 如果是想这个input框的内容始终保持value设置的值,应该多设置一个
readOnly属性
知道了这些后,我们就可以做一些非常有趣的效果,比如一个只能输入数字的输入框
1
2
3
4
5
6
7
8
9
10
11
12
13
14
15
16
17
18
19
20
21
22
23
24
25
26
27
| import React from 'react'
interface IState {
val : string
}
class NumberInput extends React.Component<Object, IState> {
state = {
val: ""
}
updateInputVal = (val : string) => {
val = val.replace(/\D/g, "");
this.setState({
val
})
}
render() {
return (
<input type="text" value={this.state.val}
onChange={e => this.updateInputVal(e.target.value)}
/>
)
}
}
export default NumberInput;
|
CSS Module
https://blog.sakura-snow.com/post/Blog-webpack-learn-4/
我在写Webpack的博客时写到CSS Module时,本来想在里面演示一下在React或者Vue中使用CSS Module的,因为原生使用实在是太奇怪了,但是没想到怎么通俗易懂的讲清楚,所以就留到现在了
问题不大,我们现在来看一下怎么用
1
2
3
4
5
6
7
8
9
10
11
12
13
14
15
|
.wrapper {
.text {
color: #fff;
font-size: 25px;
}
input {
width: 300px;
height: 30px;
box-sizing: border-box;
border-radius: 5px;
padding: 0 5px;
outline: none;
}
}
|
1
2
3
4
5
6
7
8
9
10
11
12
13
14
15
16
17
18
19
20
21
22
23
24
25
26
27
28
29
|
import React from "react";
import Style from "./FormComp.module.scss";
interface IState {
inputVal : string
}
class FormComp extends React.Component<any, IState> {
state = {
inputVal: ""
}
updateInputVal(val : string) {
this.setState({
inputVal : val
})
}
render() {
return (
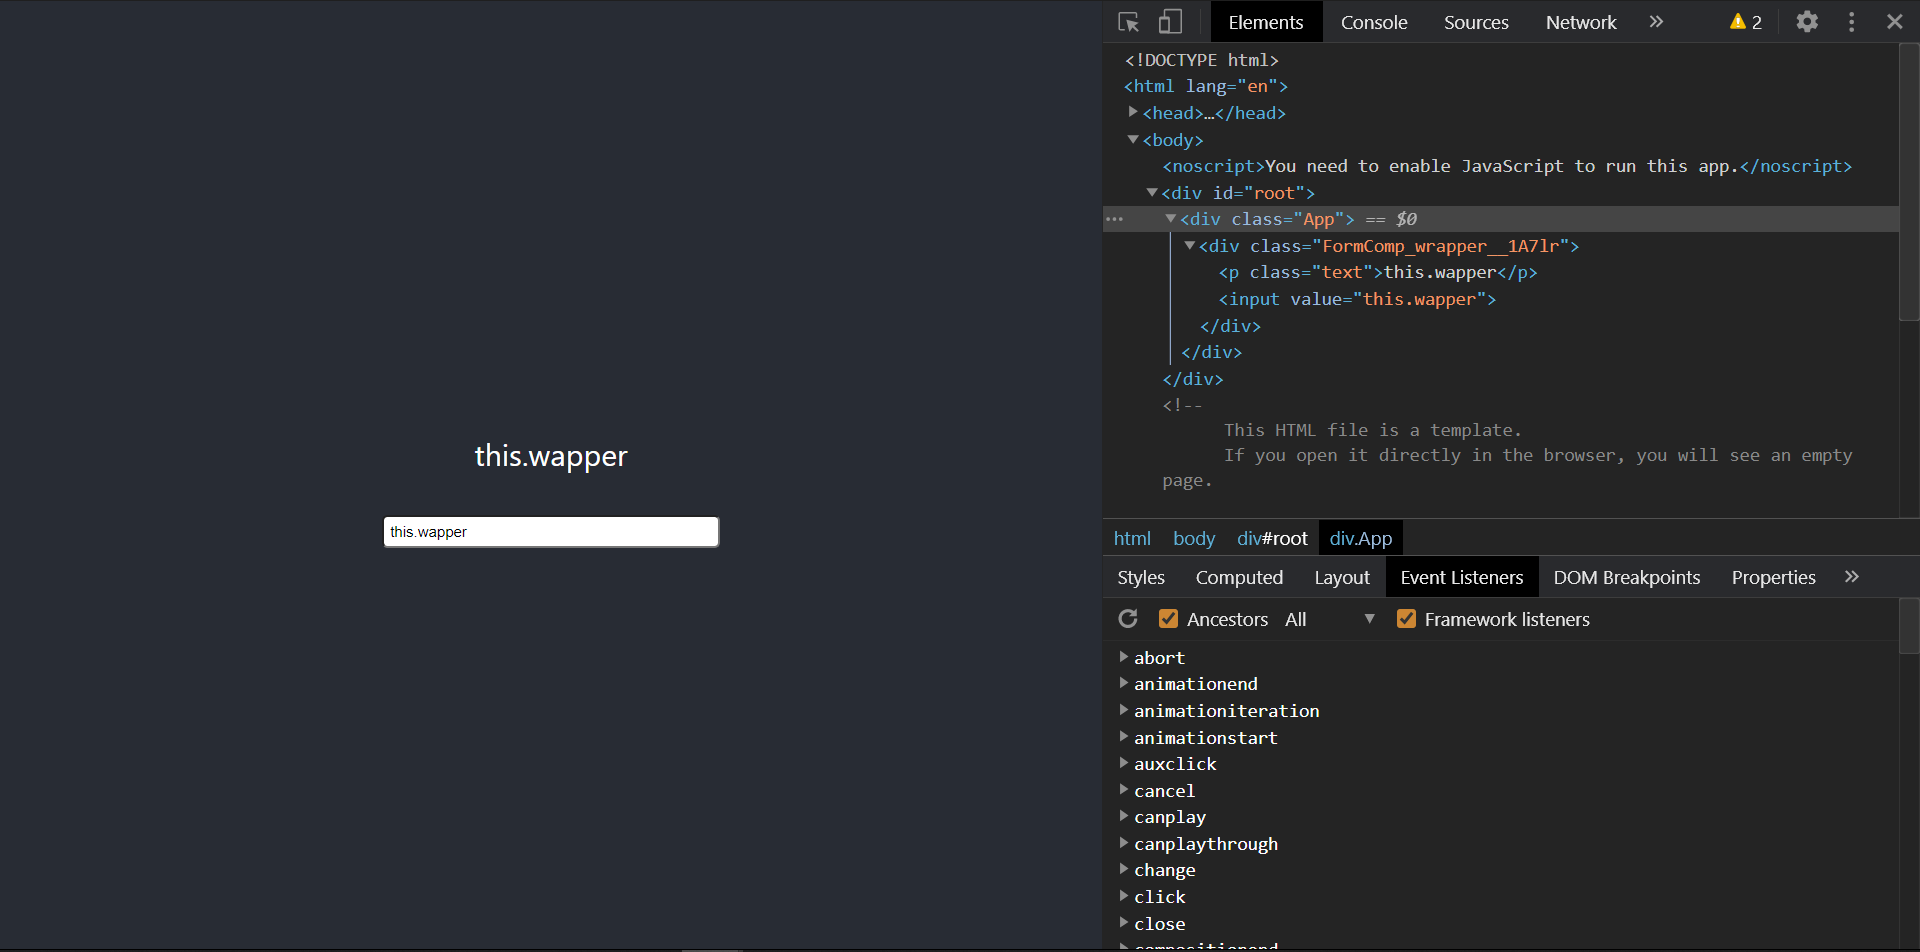
<div className={Style.wrapper}>
<p className={"text"}>{this.state.inputVal}</p>
<input value={this.state.inputVal} onChange={event => {
this.updateInputVal(event.target.value);
}}/>
</div>
);
}
}
|
应用成功√
这样就不用担心不同组件之间的样式会冲突了